
Take Advantage of Mobile Photography: Never miss a shot
This has been adapted from a previous live workshop given by David Hsia (@syntax_error) in partnership with Olloclip, Art Of Visuals, Artifact Uprising, and The Seventh Letter gallery in December 2016. While much of the content is universal, many of the apps mentioned are iOS specific, but some are cross platform.
I know you have…We all have!
Have you wanted to make the most out of the camera in your pocket? Curious to learn some techniques that will expand the creative possibilities of your iOS or Android phone? In this article, we’ll explore the possibilities unlocked by adding various Olloclip lenses and other accessories to enhance your field-of-view, discuss several simple yet effective compositional tips and overall best practices, and take a look at some editing apps to up your mobile photography game.
Some of the things we’ll cover:
- Shooting with Olloclip lenses and other hardware
- Creativity & Alternatives
- Simple Do’s and Dont’s
- Using Mobile Apps (To Shoot)
- Using Mobile Apps (To Edit)

HARDWARE ~ Lenses
The photo editing app market is proliferated with powerful apps ~ some are capable of expanding your cameras native functionality, others provide you with incredible stylistic options. With all that’s available, It’s often tempting to take a quick photo and assume you can correct it afterward in post-production. While true, in most cases you’re better off capturing the best possible image IN-CAMERA by using sound technique and vision.
This will allow your editing to be what is was meant to be: a series of tools for enhancing and making minor adjustments to an otherwise photographically-sound photo, not its savior.
Mobile photography lenses:
Using the right hardware is key and the first to mention are lenses. It’s no doubt our phone’s cameras are powerhouses, but they have a fixed focal length which means they are only capable of presenting your surrounding within a single field of view. Olloclip and other manufacturers make exceptional lenses that can be added onto your phone to extend the capabilities of the stock camera. They assist us in taking photos by expanding/changing our field of view. So what do these lenses do?
Macro –
Synonymous with “close up” shots, macro lenses are best at close range and optimized for edge to edge sharpness. Their ability to focus when you are super-close to your subject is what sets them apart, with its ability to magnify accurately being it’s strongest quality. If you seek detail in very small objects and living organisms (like insects and flowers for example), then pick up a macro lens.

Telephoto –
Telephoto lenses have longer focal lengths and more narrow fields of view, essentially bringing your subject “closer” to you. Handy for cases where you need to physically close the gap between you and your subject, telephoto lenses are also useful for creating different compositions. Keep in mind that telephoto lenses attached to your mobile phone are typically at a fixed magnification, and do not zoom like their DSLR counterparts.
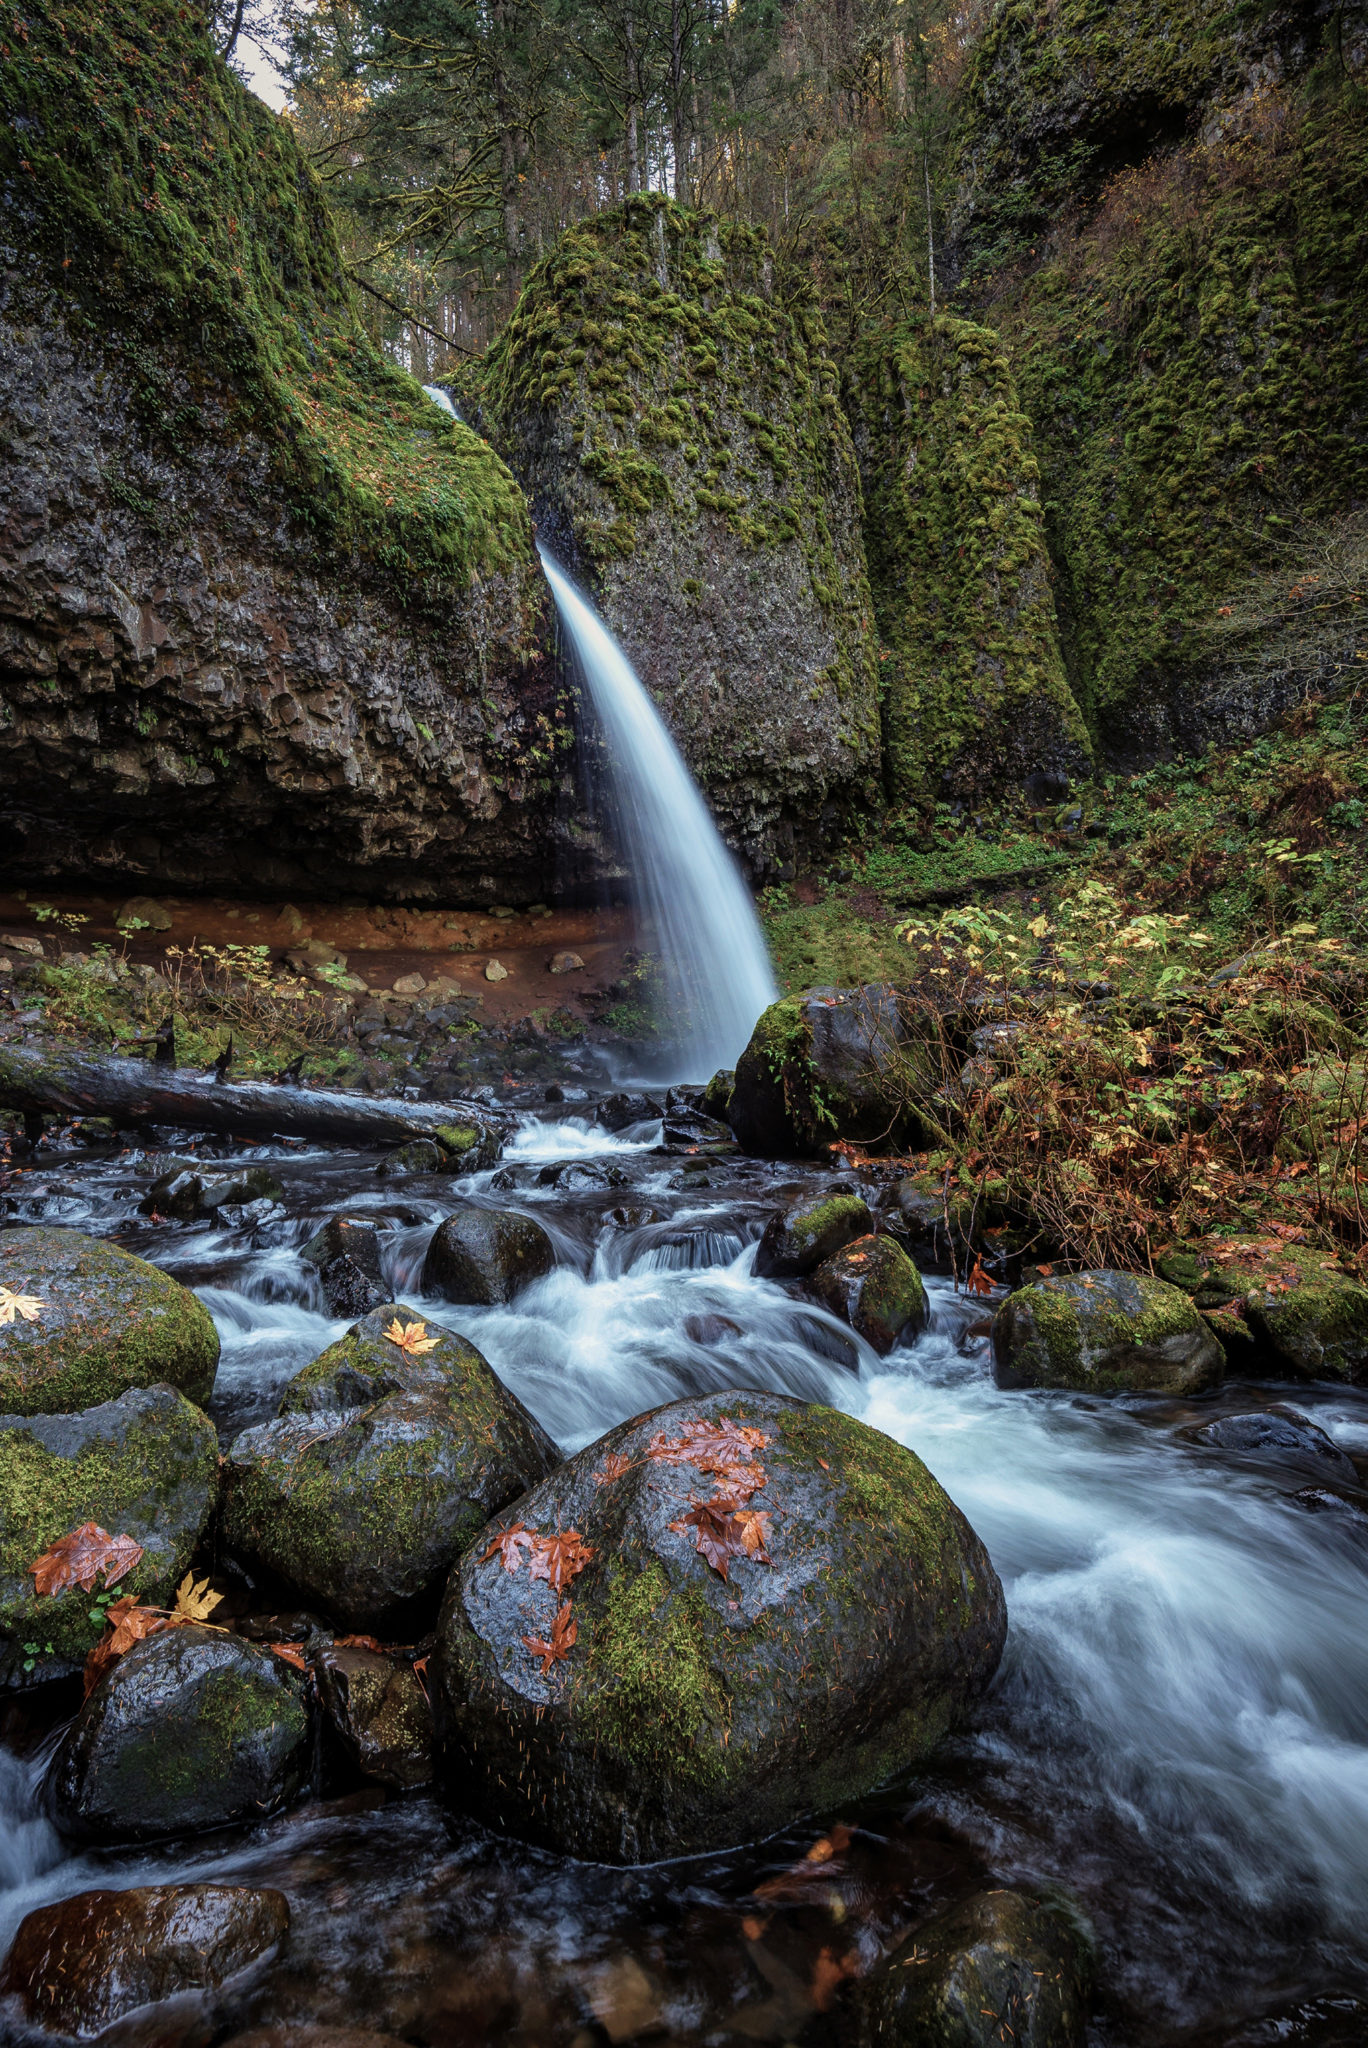
Without a telephoto lens

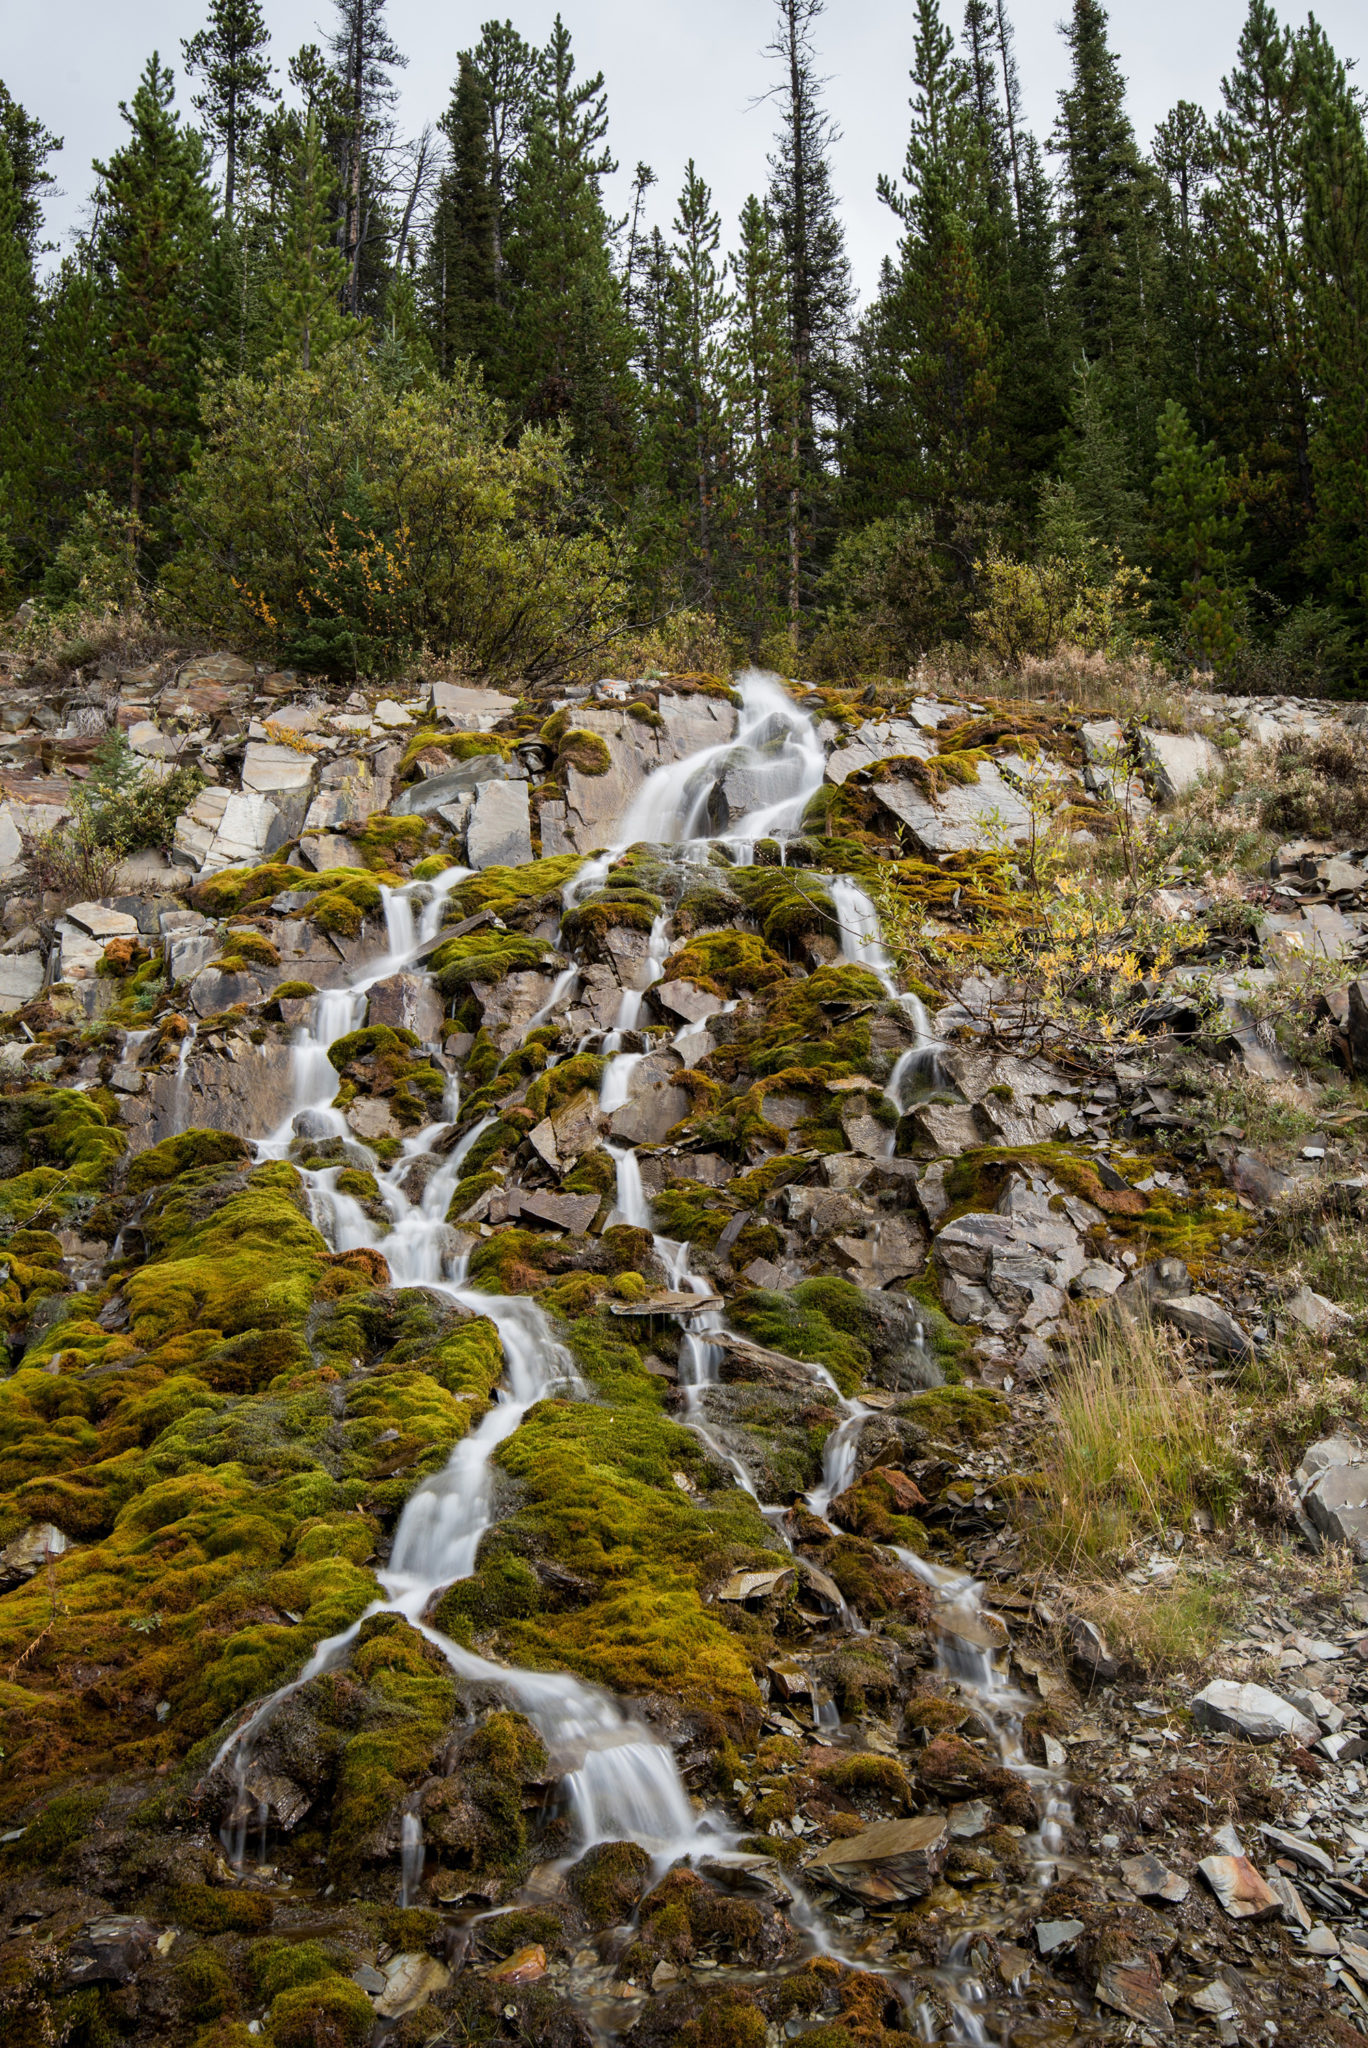
With a telephoto lens
Wide Angle –
Essentially a lens with a shorter focal length, wide angle lenses are extremely popular for a variety of shooting situations. From landscape to architecture to indoor situations, wide angle lenses allow you to capture more of the scene within your composition. But be aware of the natural distortion they introduce as things closer to the camera appear larger than things farther away, even if they are actually the same size.

Without a wideangle lens

With a wideangle lens
Fisheye –
Fisheye lenses are ultra-wide wide angle lenses with a very specific purpose: to produce hyper-distorted images that optimize for spherical or panoramic images. The applications for fisheye lenses are endless, but they are the most niche lenses of the group, definitely not for everyone. They work exceptionally well when shooting naturally curved objects or scenes with interesting lines (the latter creates some wild results).
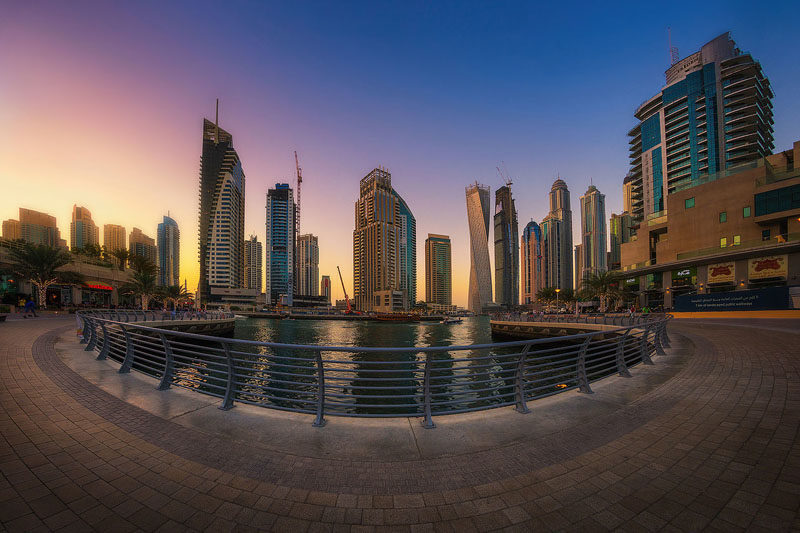
Photo by Albert Dross
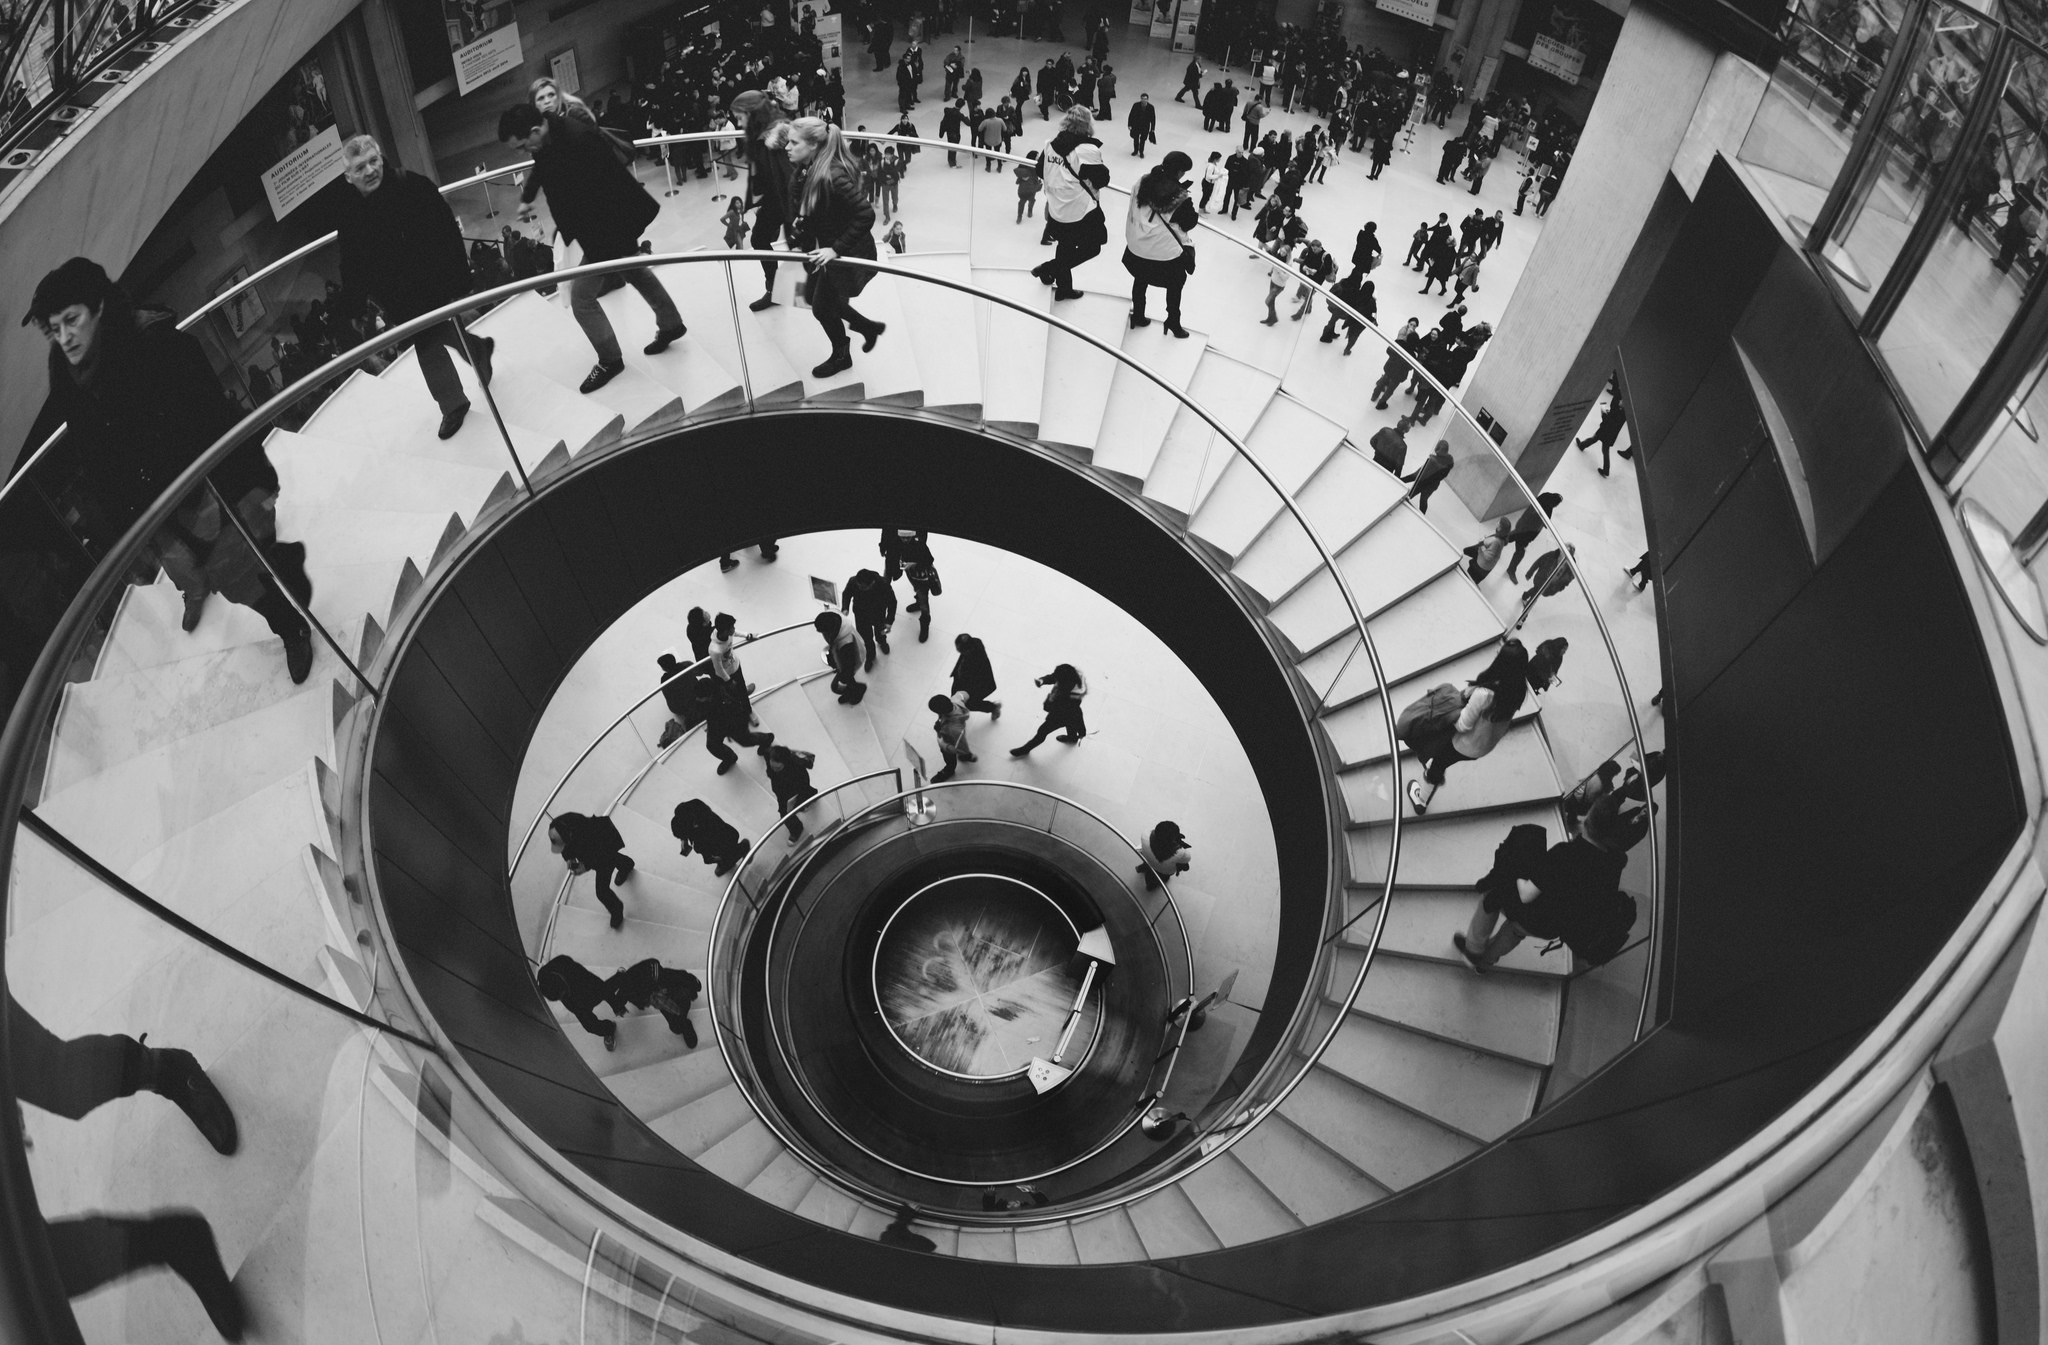
Photo by Dora Hon

HARDWARE ~ Tripod/Shutter Release
Sharpness is king. In any photo. Tripods aren’t only for professionals, they’re relevant for anybody shooting on any platform when the stability is suspect. There are a lot of things that can create camera shake ~ wind and vibrations, unstable ground, even the beating of your heart during physical activity can impact the sharpness of your photo. To provide more stability when taking the shot, consider a lightweight tripod. It will help in low light conditions, allow you to take long exposure shots (when used in conjunction with the right apps), and even prevent shake at close distances if you’re a macro photographer.
JOBY: makes a very small but effective wireless shutter. It’s about the size of a couple nickels stacked together. It only takes a few moments to pair with your camera, and from there you’re able to shoot without needing to touch the camera’s screen. Put your phone on a small tripod and you can even take selfies from 25-50 feet away. In a pinch, Apple headphones offer the same functionality: just use the mic button as the shutter release!
https://www.amazon.com/Joby-Impulse-Remote-Control-Griptight/dp/B01LXURNNP
- Arsenal is a recent Kickstarter project that also has this ability (along with many other features). https://www.kickstarter.com/projects/2092430307/arsenal-the-intelligent-camera-assistant-0
- If you have neither a tripod or a wireless shutter release, a simple technique you can use to provide a little extra stability is to not touch the screen to take the photo…use either of the volume buttons instead.
CREATIVITY & ALTERNATIVES
When you approach a scene, do you find yourself looking for the same things over and over, starting a repetitive process that yields photos that look too similar? Hardware helps, but what to do about creativity?
Try Shooting from Different Angles Perspectives
Bend down, lay down, climb up. Shooting from a low angle is a great option if you want the object to look big, mighty and powerful. It can also allow you to capture more foreground detail which is perfect for creating depth in landscape photos and for shooting puddle reflections. can dramatically change the mood of a photograph. Let’s take an image of a child as an example. Shot from above, a photograph of a child makes her appear diminutive, or less than equal to the viewer. Shot from her level, the viewer is more easily able to see things from her point of view. In this case, the viewer becomes her equal rather than her superior. But shoot that same child from below and suddenly there’s a sense of dominance about the child.
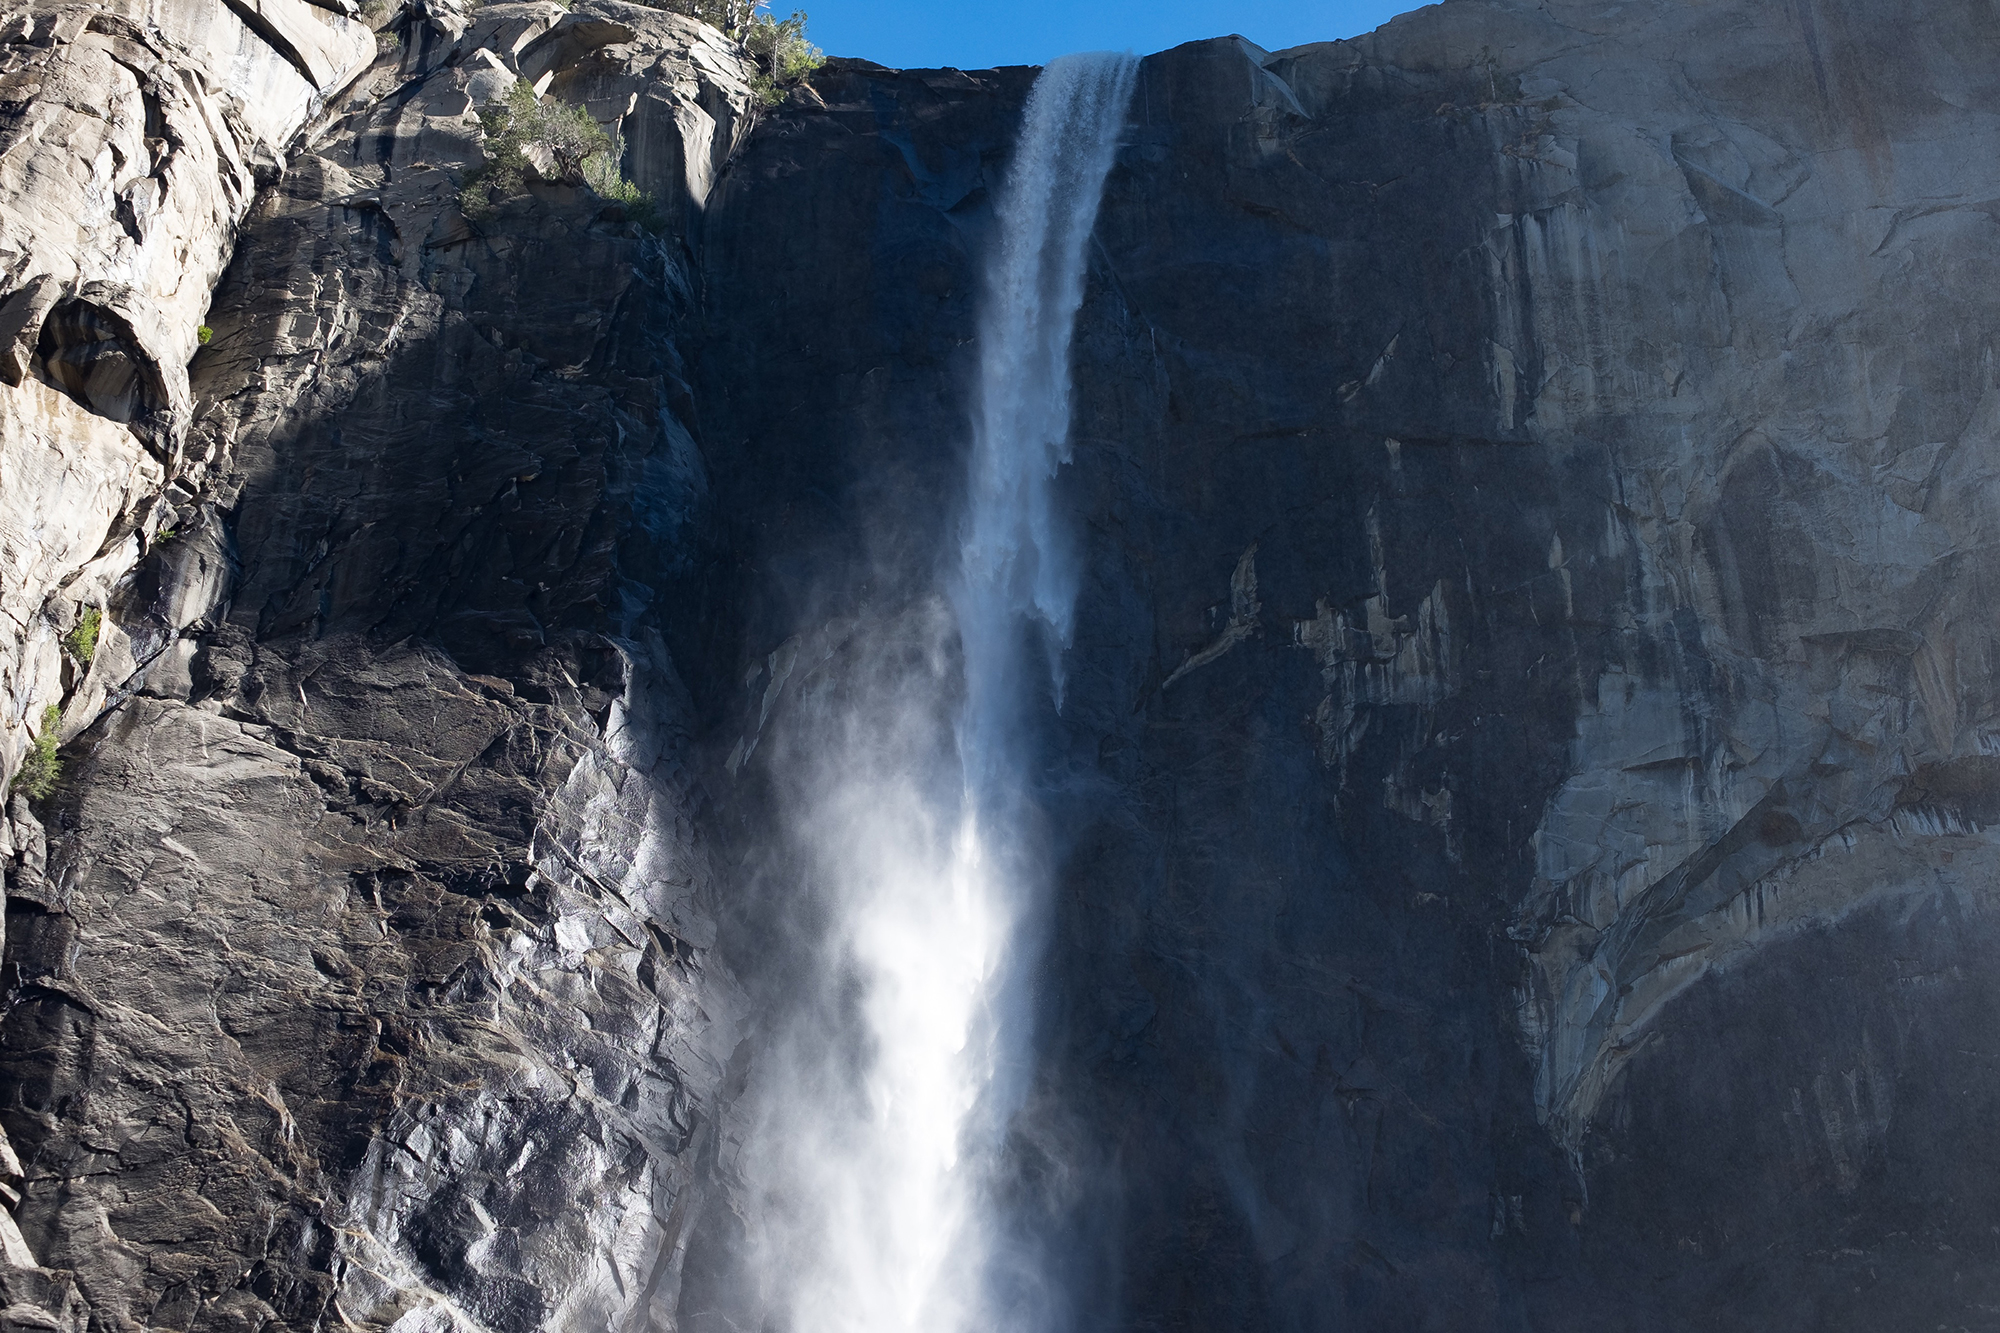
Fill the Frame We’re all trained to get the subject into the frame and center it to make it a clear focal point. But often times the more creative photo involves cutting off part of the image intentionally. This can make a photo more “suggestive”, and when taken more to an extreme we call it “filling the frame”. Similar to cropping in on a photo to the point where the viewer loses context, this allows the details to shine through. In the absence of skies, buildings and surrounding details the viewer sees the subject matter in a different, often less familiar light.
Before
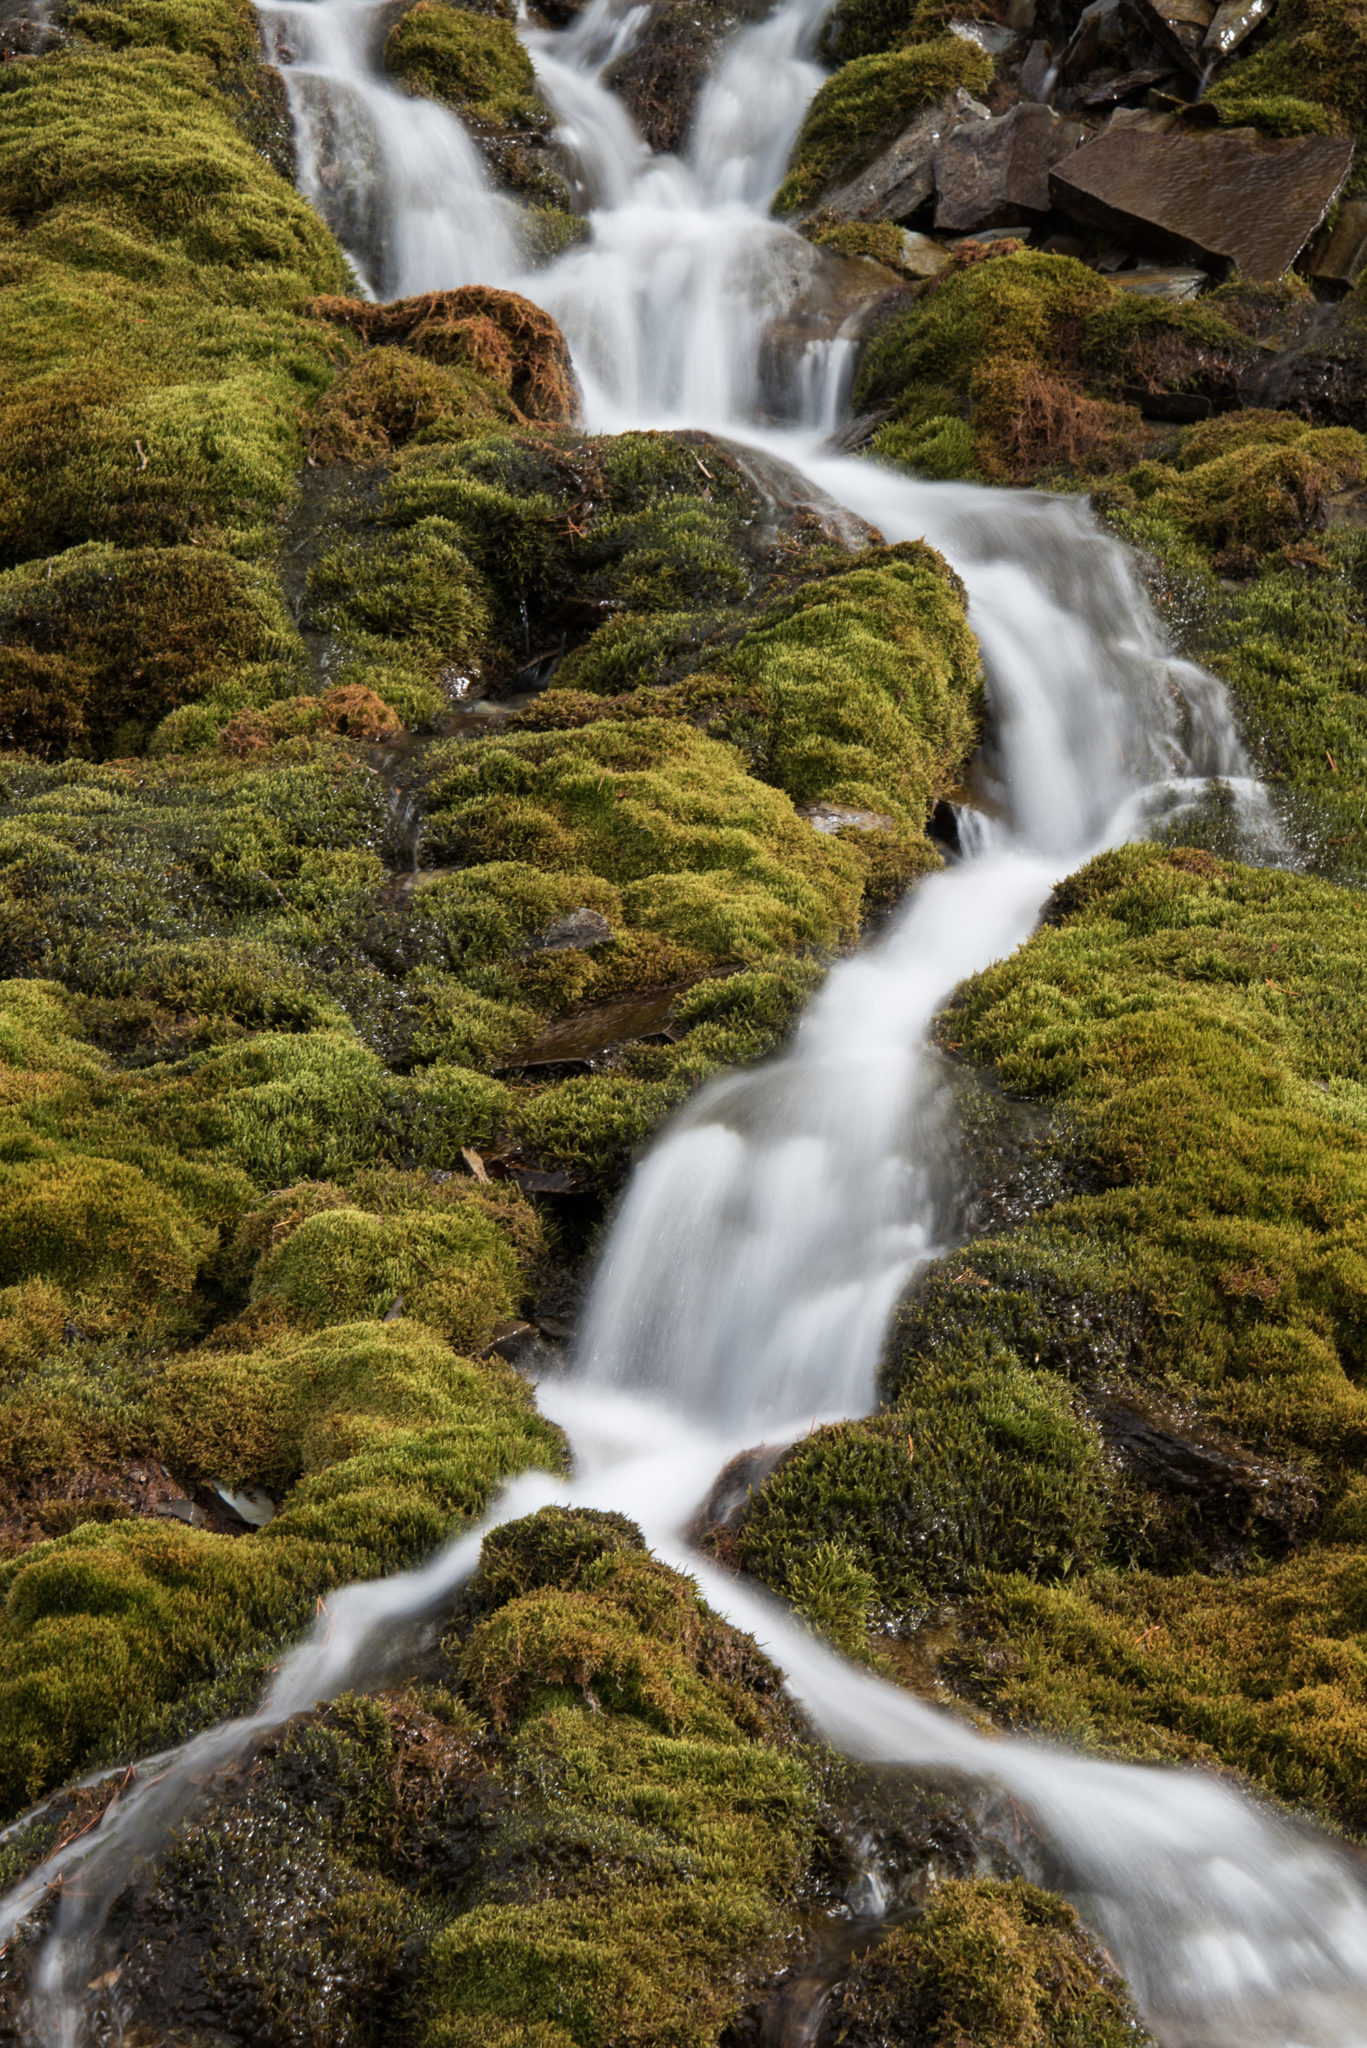
After
Include a Person in the Scene
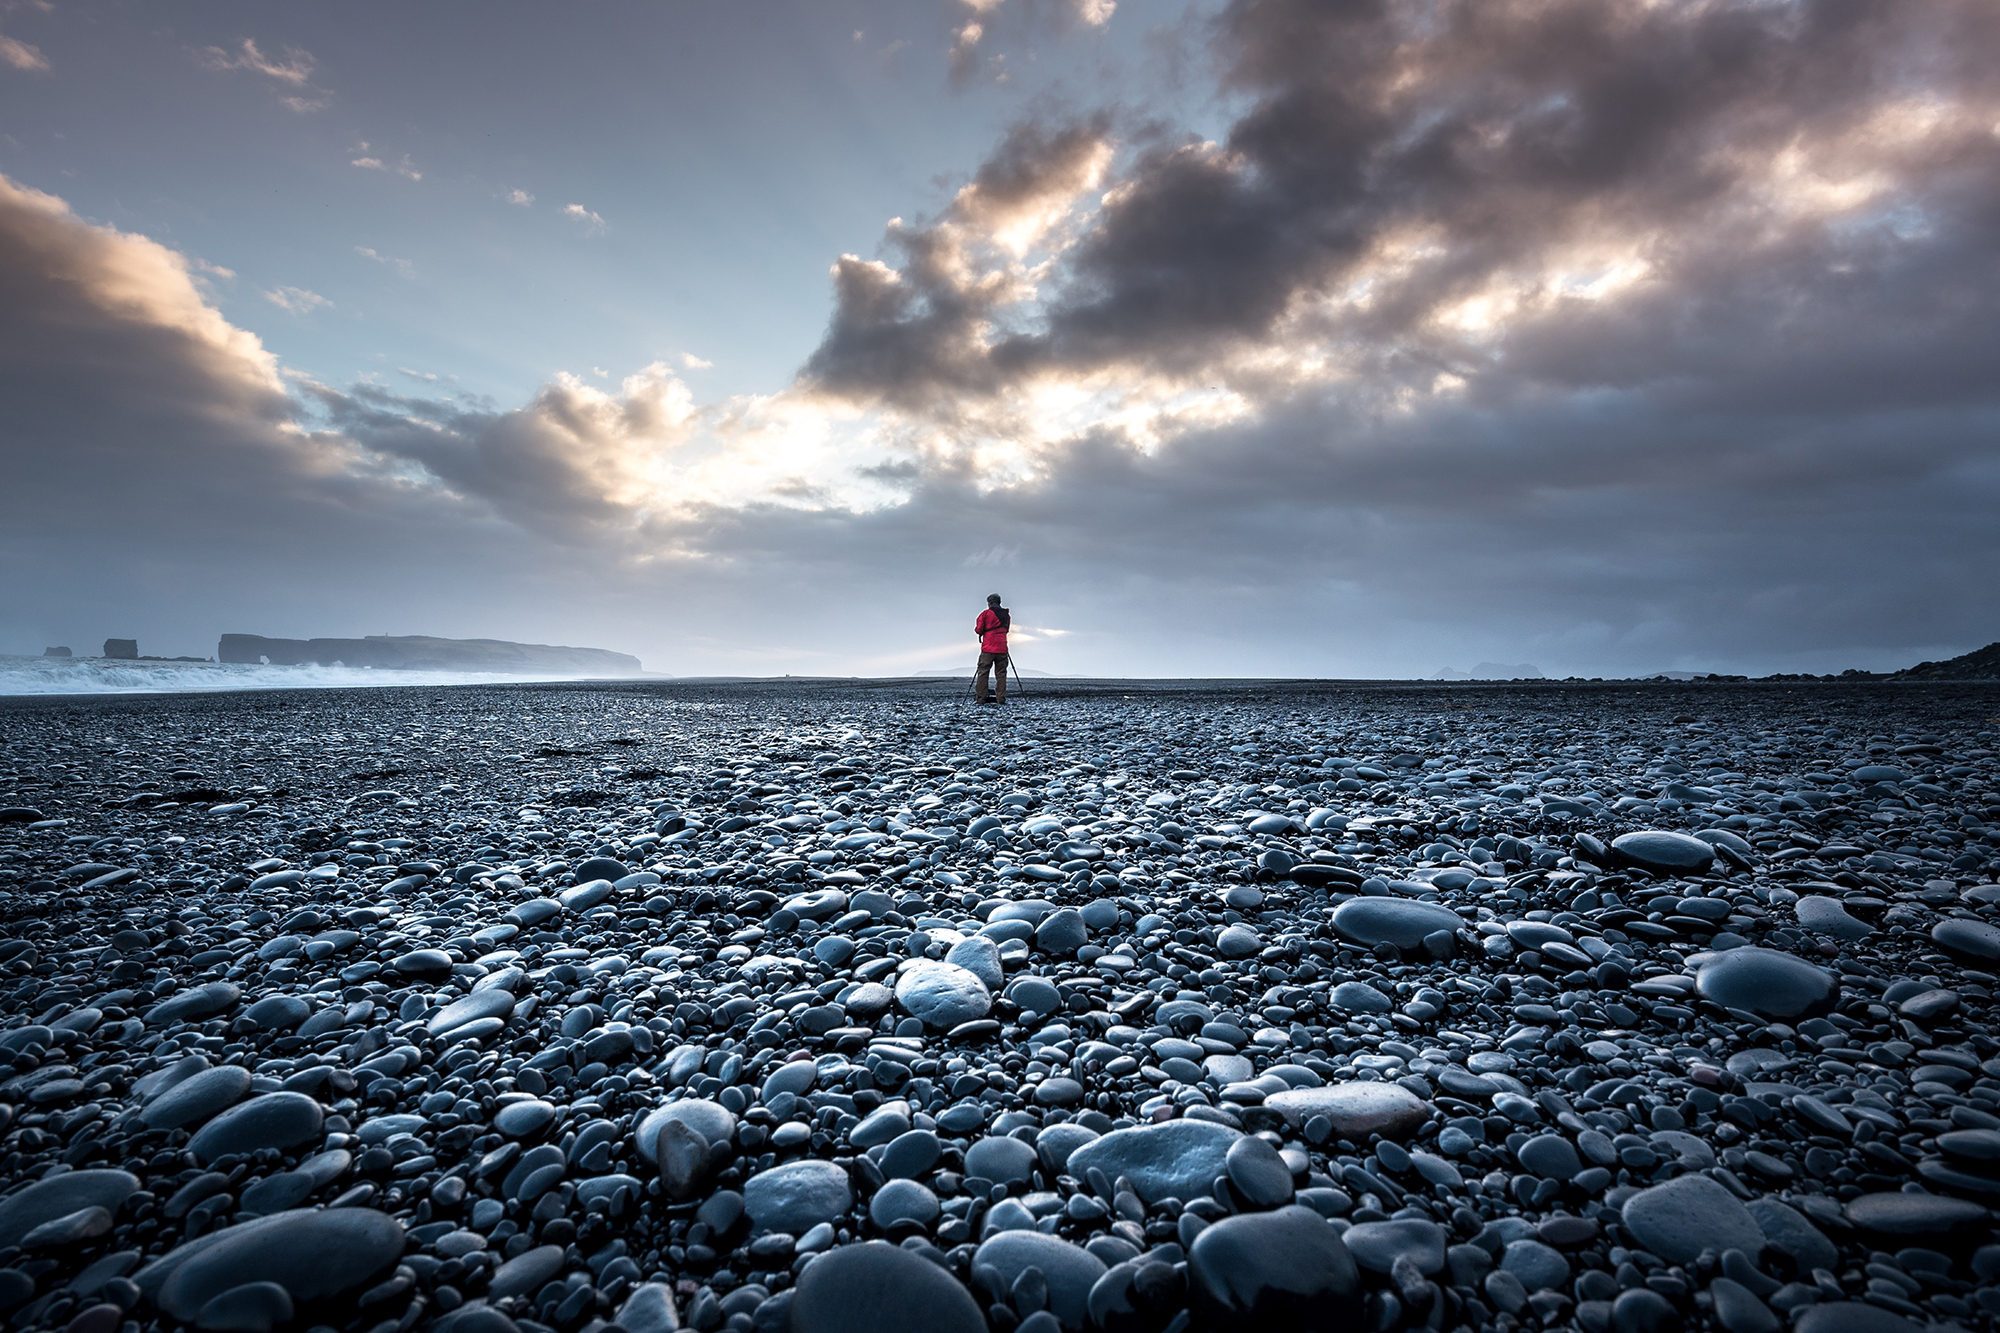
As wildly popular as this is, it works because it adds a dimension that some photos lack ~ storytelling. By adding a focal point, the storytelling element helps connect the user to the photo. In the case of vast landscapes or settings of immense size, a person in the photo helps to convey a much-needed sense of scale.
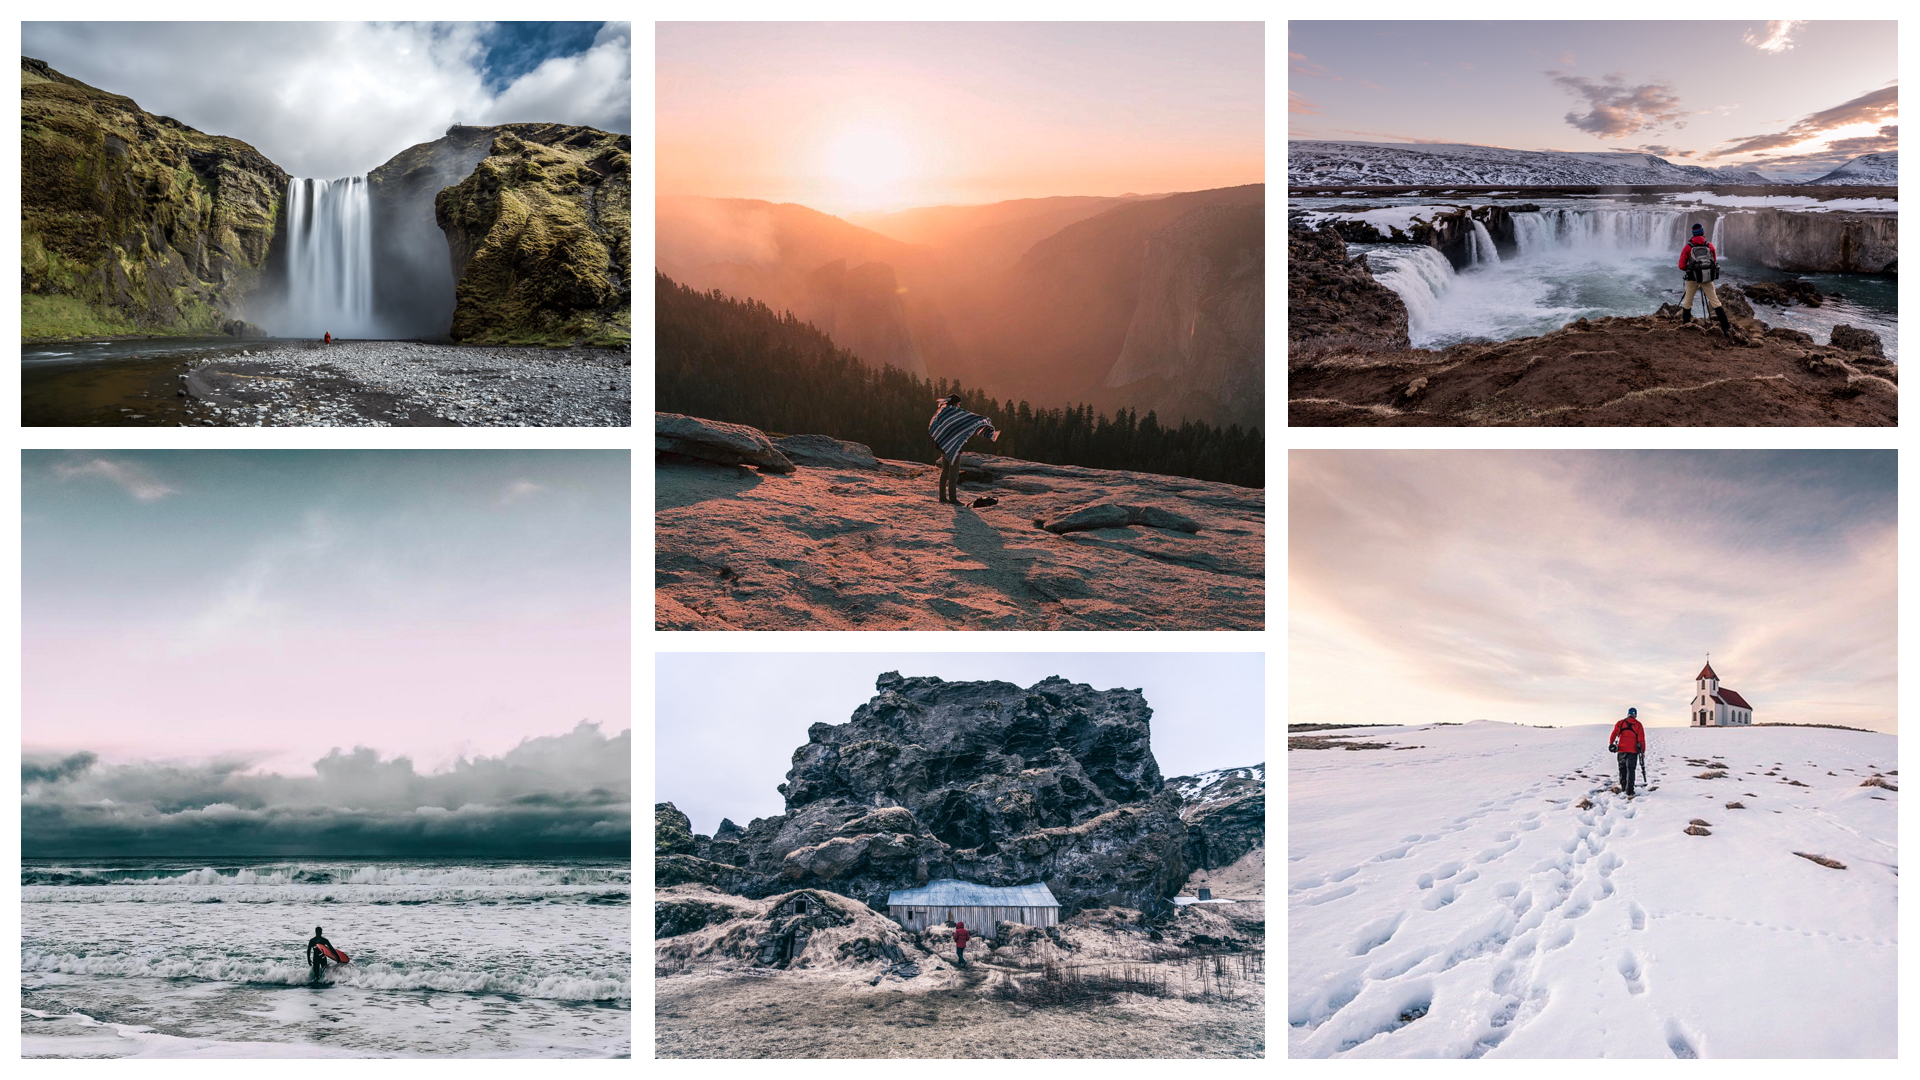
Craft a Story/Campaign
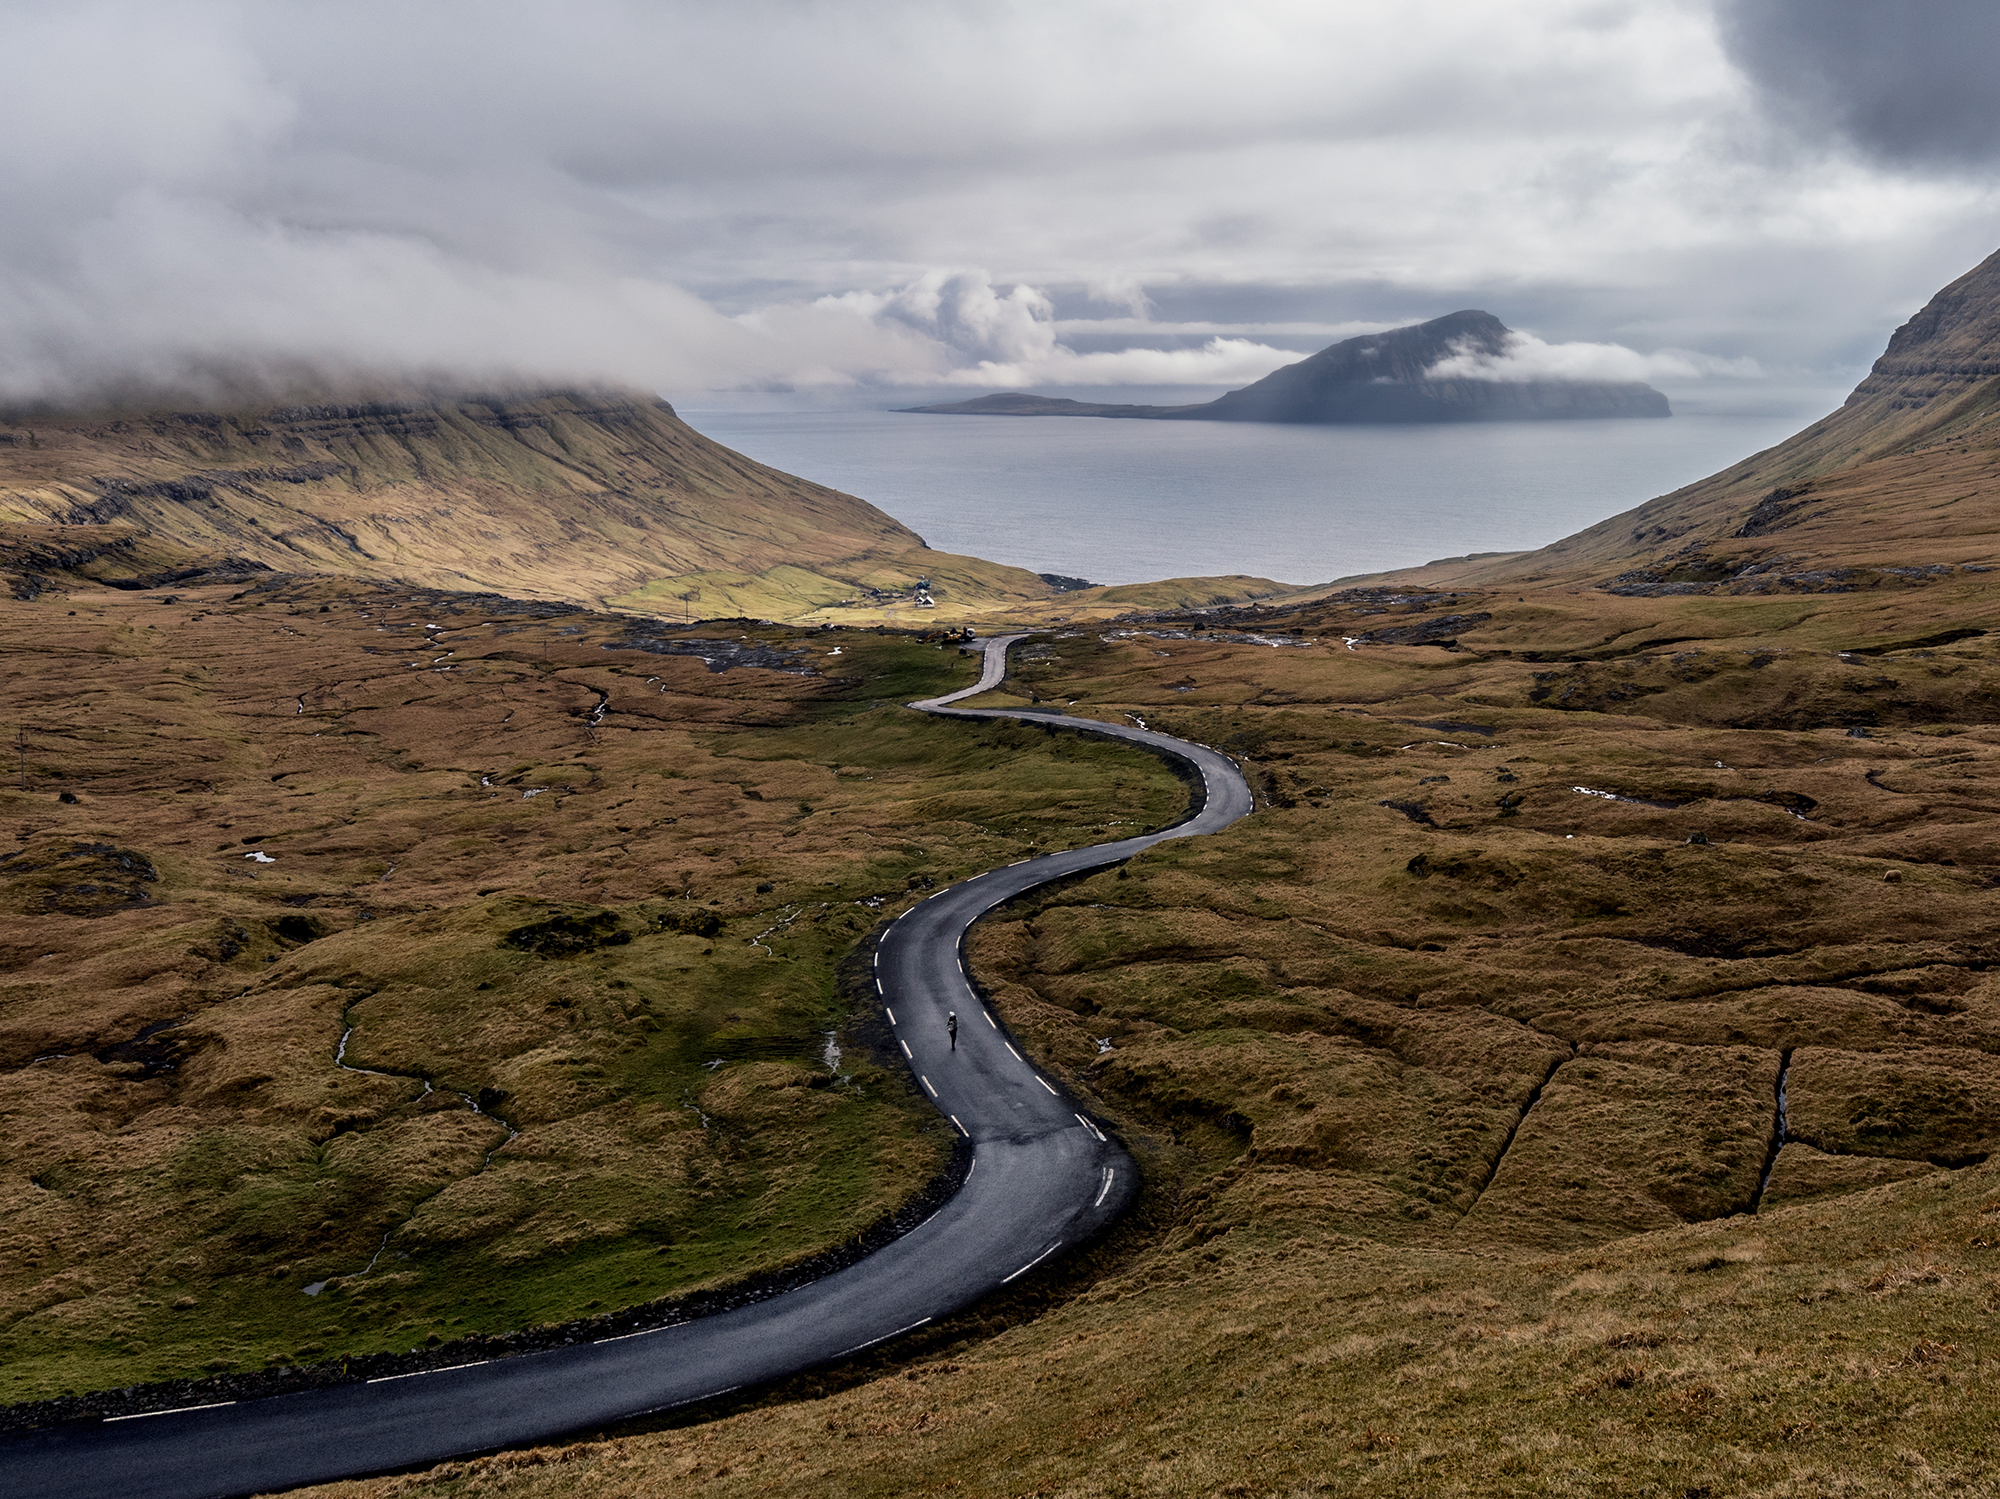
Often times a story can be told in a single image. Other times, it can be interesting trying to collect all the component pieces and find a common thread that runs through them all, providing a creative theme. In a recent visit to the Faroe Islands, I certainly walked away with many still images that had their own story of a particular location. But the country itself exuded a much larger overall “vibe” ~ one of adventure, folklore, and rustic simplicity. I felt the best way to remember that trip was to create a series of shots that focused on light, texture, simple objects and patterns. While underwhelming on their own, together they form a cohesive story more potent than a singular image.

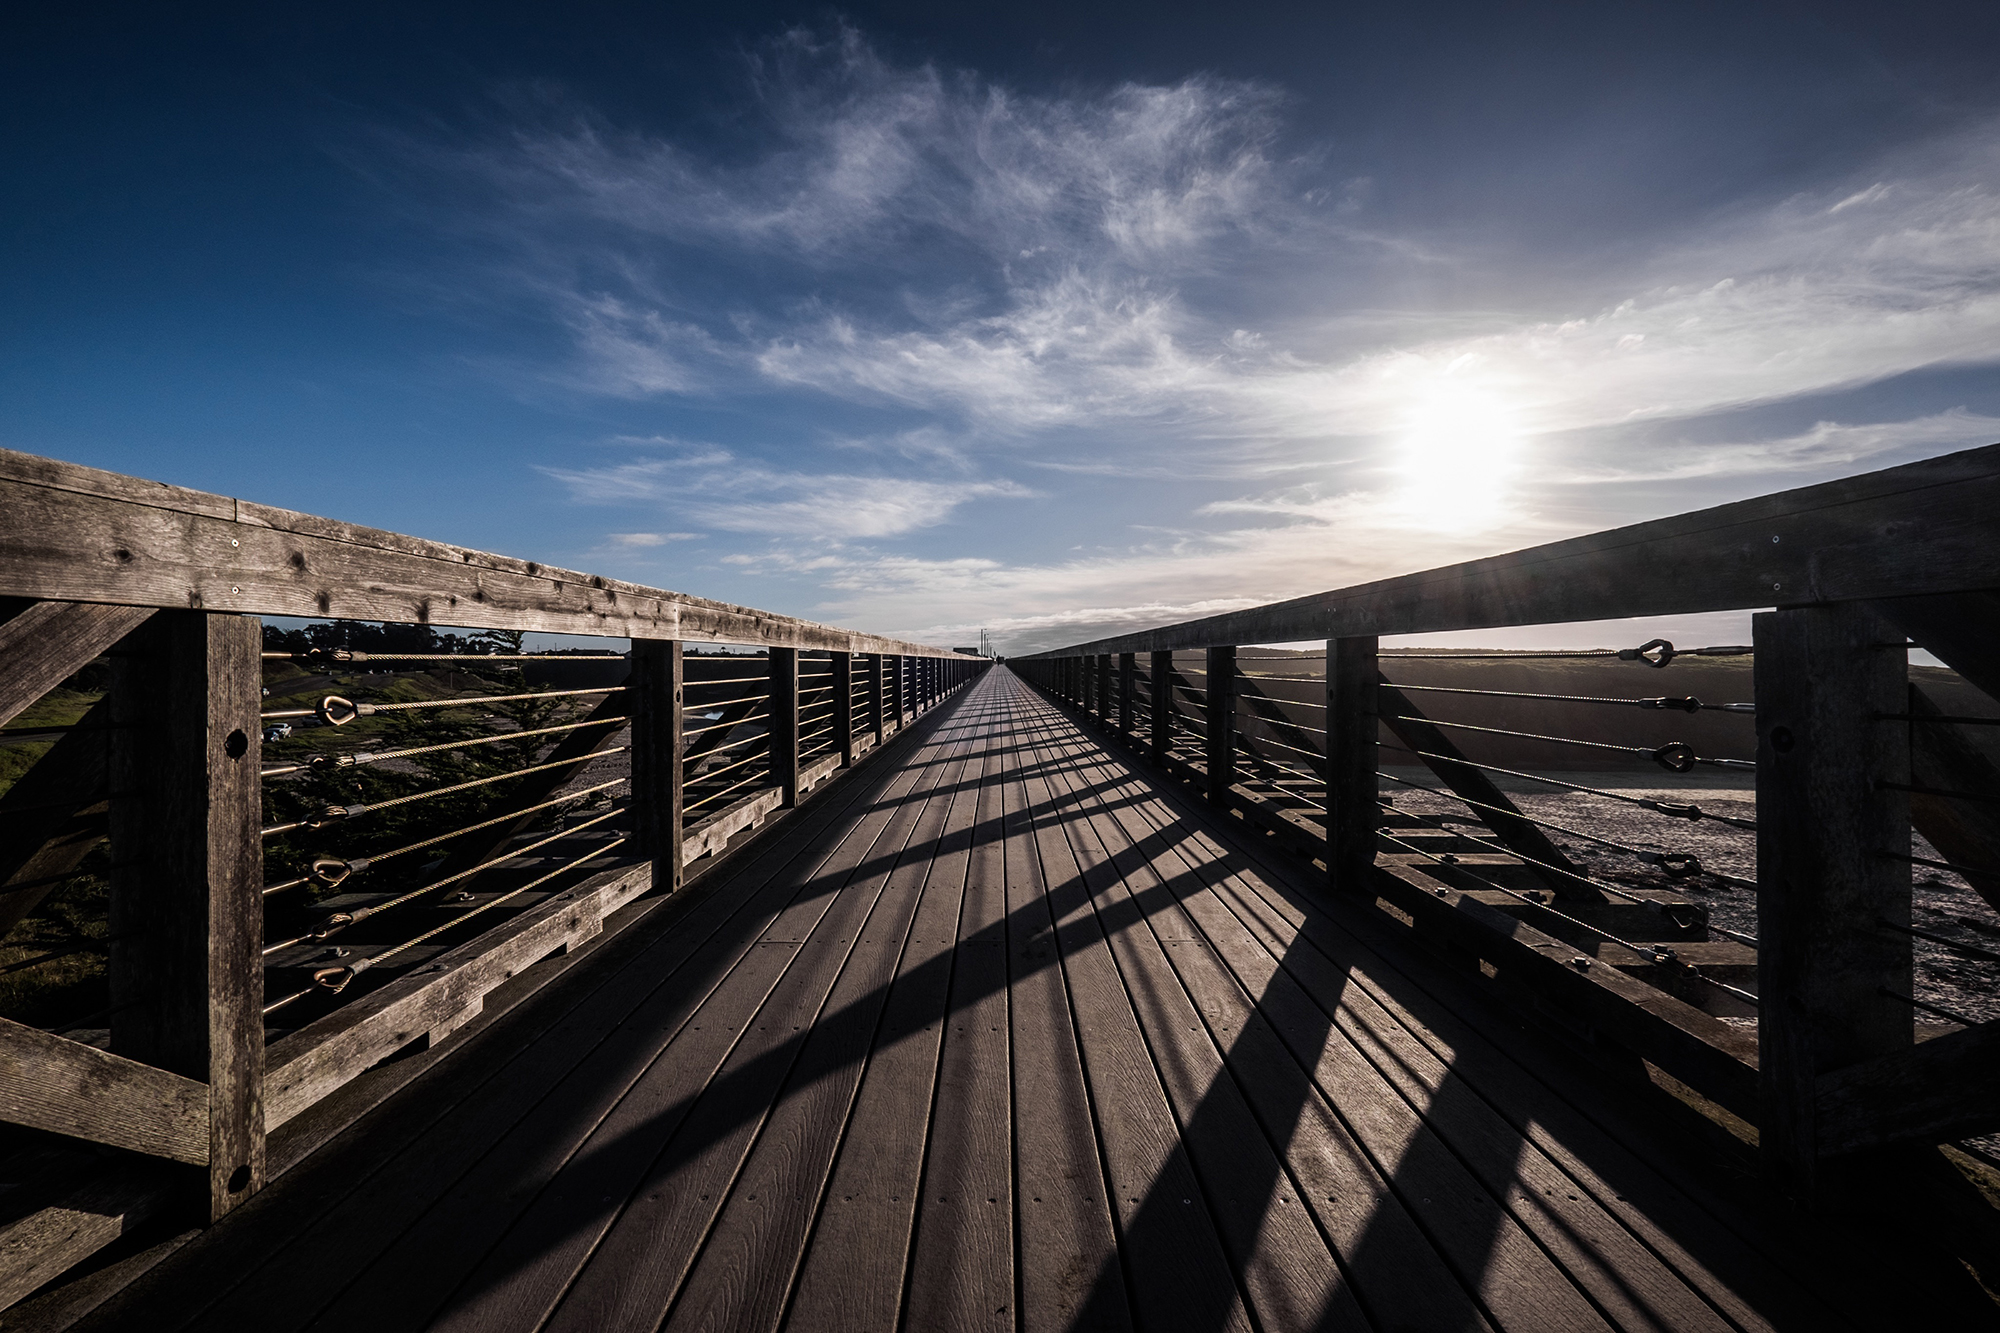
Leading Lines
This simple technique that involves using vertical, horizontal or converging lines to focus attention on the subject of your image. (show example) Leading lines can be man-made structures (rails, painted road dividers, just about anything really) or they can be natural (rows of trees, streams or rivers, etc) Always keep an eye out for how to incorporate leading lines into your composition.

Shoot in B&W– If the background has a lot of distracting colors, turn it to BW (show example) Light and shadow become more obvious in the absence of color, also shifting the focus more to shape and texture instead of saturation. The formula for capturing one’s attention is changed ~ things like curves, leading lines, and shapes come to the forefront. Look for high contrast areas between light and dark, shadows and highlights become a prime focus.


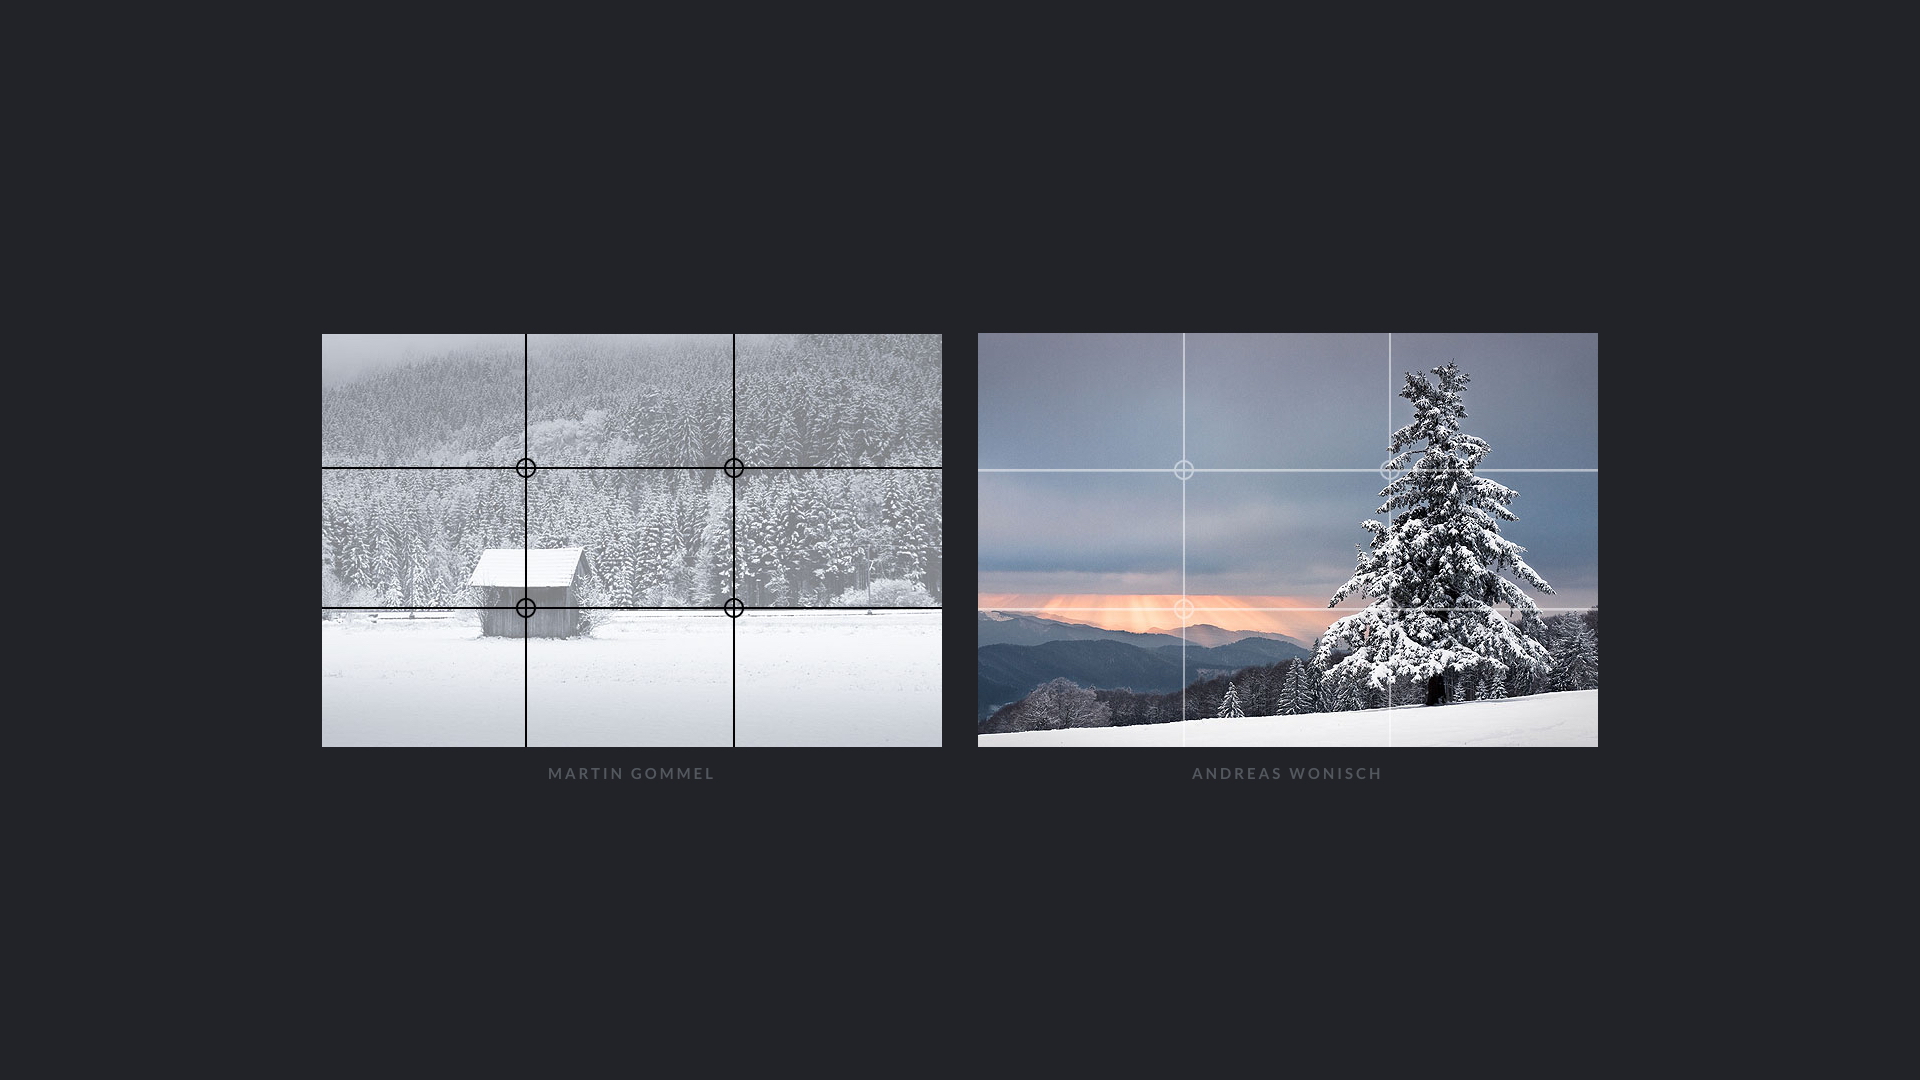
Rule of Thirds (Turn on the GRID)
The rule of thirds is a way of splitting up your image using four lines: two horizontal and two vertical. Continue by placing the prominent elements in your composition along those lines, or at the points where they meet. A good rule of thumb is to try and place your main subject in line with one of the vertical lines. If there is a horizon in your photo, try to align it with one of the horizontal lines. The driving concept behind the rule of thirds is that off-kilter shots make for a more visually stimulating photo by avoiding perfectly symmetrical, balanced compositions.
SIMPLE DO’S & DONT’S
Before getting into the apps, I’d like to mention a small handful of simple tips that I live by. Consider them a parting shot before we move on:
- Learn to embrace the natural light, and don’t use the flash on your camera. Boost ISO if you have to.
- Whatever you do, don’t zoom! Use your feet instead. This helps in developing compositional skills and keeps your images sharper by avoiding the quality degradation when zooming in.
- SHOOT RAW: DNG files will retain more highlight and shadow detail than a .jpeg, and also give you more leeway in extreme lighting situations. They won’t look as good as a jpg in your camera roll though. Shoot RAW when you know you’re going to edit it in post. Shoot JPG if you want the camera to apply its “best guess” and process it internally.
- SHOOT MULTIPLES – If you find the timing on some of your shots is off by just a hair, shoot in burst mode then delete the ones that don’t make the cut.
USING MOBILE APPS (TO SHOOT)
While the iPhone’s native camera is just fine (and getting better with each iteration), there are numerous camera apps that provide additional functionality than the stock camera on your phone, and even more apps others that are great for resolving specific issues with photos. Here are some solid choices:
Manual
Old reliable. Manual gives you more control by allowing you to independently set values for shutter speed, ISO, and focus. In addition, it has a built-in histogram that can let you know if your photo is over or underexposed before you click the shutter. And of course, the main draw is its ability to shoot in RAW format, giving you a much wider dynamic range when editing your photos.
Not available for Android, but try Camera FV-5 instead: https://play.google.com/store/apps/details?id=com.flavionet.android.camera.pro&hl=en
Halide
My latest crush. Has all the functionality of the aforementioned Manual app, but with a much more modern and intuitive UI. Aside from the inventive interface, there’s also focus peaking technology built into the app, so you’ll always know what parts of your scene are in or out of focus before you even take the shot. Pretty neat, right?
iOS Only: https://halide.cam/
Cortex Cam
Shooting in low light situations typically means the noisy images. Cortex Cam takes a unique approach to addressing that by taking a series of images of the same scene, then merge them all to process out the sensor noise. Since it takes a few seconds for the app to gather all the images, there’s a chance of experiencing camera shake, so consider this a great add on to using a tripod.
iOS: https://itunes.apple.com/us/app/cortex-camera/id517488939?mt=8
Android: https://play.google.com/store/apps/details?id=com.cortexcamera.cortexcamera_production&hl=en
Slow Shutter
Not a great UI, but for people who want to achieve some long exposure magic Slow Shutter makes it easy by optimizing its settings for Motion Blur, Light Trail, or Low Light capture. The way it handles the controls for each of the three are slightly different, with a unique slider dedicated to each style. Light Trail has a “Light Sensitivity” slider, Motion Blur has a “Blur Strength” slider, and Low Light has a “Noise Reduction” slider.
iOS: https://itunes.apple.com/us/app/slow-shutter-cam/id357404131?mt=8
Not available for Android
USING MOBILE APPS (TO EDIT)
When editing photos, I like to think of the process as two steps ~ micro edits first (perspective correction, and removing unwanted elements), then macro edits (exposure, cropping, stylization). Linking this back to the point of taking the best photo IN-CAMERA you can, one would then follow up with micro-edits to remove blemishes, then stylize at then ver end with macro edits.
Here are some great apps for dealing with specific issues:
MICRO EDITS
SKRWT (https://skrwt.com/)
Probably the only 3rd party distortion and perspective correction app you need. While many apps are building pieces of this functionality into their apps (Instagram, Lightroom Mobile, etc) none can match the range and control of SKRWT. Just about any alignment and perspective issues can easily be ironed out with just a few swipes. Horizontal, vertical, and even device-specific distortion can easily be corrected. Additionally, it has 2 partner apps for mirroring (MRRW) and 4-points correction (4PNTS) with the same, familiar interface as the parent app, SKRWT.
iOS: https://itunes.apple.com/us/app/skrwt/id834248867?mt=8
Android: https://play.google.com/store/apps/details?id=accky.kreved.skrwt.skrwt&hl=en
Touch Retouch
There’s no simpler way to remove unwanted elements from a photo. Got photobombed? Have people, electrical wires, or rocks in the foreground? Touch Retouch easily handles all of them, often with one or two swipes. All the powerful cloning and removal features of Photoshop in one simple app.
iOS: https://itunes.apple.com/us/app/touchretouch/id373311252?mt=8
Android: https://play.google.com/store/apps/details?id=com.advasoft.touchretouch&hl=en
MACRO EDITS
Darkroom
Unlike many other apps that require some sort of recalculation every time you make a slider adjustment, the Darkroom UI displays all of that in real-time and that’s a boon. It’s something you may not really think of until you actually try it and it makes a huge difference. While it’s not unique in that ability, the balanced collection of editing controls (both advanced and basic) make it one of my favorites. It also doesn’t force the user to save out a new image after every session, instead, it saves each version within the app which is a nice way to keep your camera roll clean and save space.
iOS: https://itunes.apple.com/us/app/darkroom-photo-editor/id953286746?mt=8
Not available for Android
Lightroom Mobile
Lightroom Mobile is an absolute powerhouse when it comes to functionality. From its ability to synchronize photos from the desktop program, to its own built-in camera app, there’s very little it doesn’t do. If you’re an existing Lightroom user, you’ll find this mobile version offers many of the same editing controls as the more robust parent app. That said, in order to house all the different editing features the app relies on some user interface paradigms that are a bit unorthodox and may take some time to adjust to.
Snapseed
Google’s offering in the mobile photo editing space is a solid draw for one main feature. Initially one of the first to allow selective editing (where the user can localize certain effects like contrast, saturation, and brightness to a specific part of the photo only), other apps have closed the gap quickly. Snapseed is, for the most part, a one-trick pony though, the rest of its editing filters and effects are too heavy-handed. But the selective edit ability is indispensable when you need it.
iOS: https://itunes.apple.com/us/app/snapseed/id439438619?mt=8
Android: https://play.google.com/store/apps/details?id=com.niksoftware.snapseed&hl=en
VSCO
VSCO is a basic editor, not unlike many of the apps already mentioned in this article. What sets it apart from the rest is the collection of award-winning filters that emulate the look of analog film photography like no one else. While most filters must be bought, you can download starter sets from within the in-app store to get a feel for how quickly they can transform your photos into analog masterpieces.
iOS & Android: https://vsco.co/store/app
It’s nearly impossible to cover all the techniques and gear that go into making great photos, but therein lies the beauty of photography. Shoot often, try new things, and learn what works best for you. These were merely my recommendations ~ don’t be afraid to experiment…it’s ultimately how you’ll find your way.
Happy Shooting!
[…] Mobile Photography […]
typo (?)
“Best at *cose* range” in the first image about Micro Lenses
Great article though, thanks! 🙂
The photos were amazing. Especially I liked the photo with teleporto lense.