

Image by: @cynkllr_photography
11 Things to Consider When Shooting The Night Sky.
Astrophotography — also known as astro or shoot night sky photography — is a blast
It helps you explore new destinations with renewed purpose, and provides a fresh source of inspiration. After all, even the familiar location can take on a totally different vibe after the sun sets. In this post, I am going to share
There are a few things that you are going to need for your astro excursion. This is what I choose to bring along!
My Gear: Sony A7 |Rokinon 14mm Manual Focus Lens f/2.8 |Mefoto Roadtrip Tripod
Favorite Places to shoot: North Cascades, Mount Rainier, Snoqualmie Pass, Lake Chelan, and any National Park
Things I don’t leave home without: My Petzl Headlamp & Offline Maps
One wish: More time. There’s never a shortage of things to shoot in the Night Sky, but there is a small window of time to get it done. Don’t wait, learn what it takes to go into the wild and capture your dreams.
My Favorite Shots
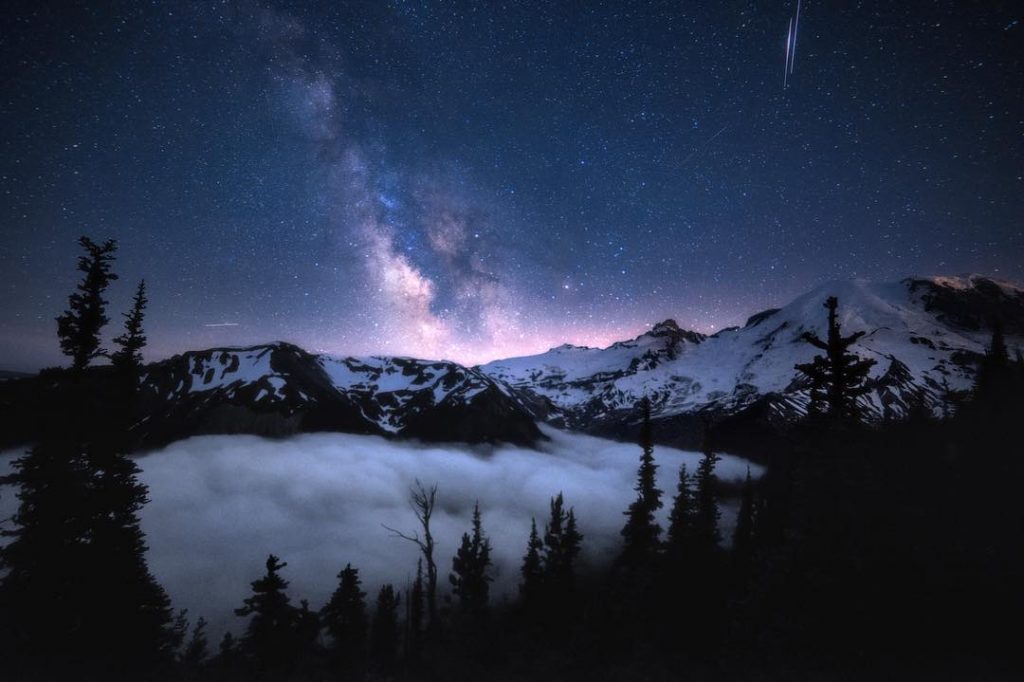
 I’ve taken thousands of astro photos, but some stand out above the others. Here are two of my favorites
— I especially like the one with blueish purple sky because it’s from my favorite location at Mount Rainier where the season is short and access is limited. This shot is only possible about two months out of the year because of the galaxy position and because it requires a new moon to get the dark sky. By late summer the Milky Way is gone from this view.
This shot with the old growth stump is from Mount St. Helens.
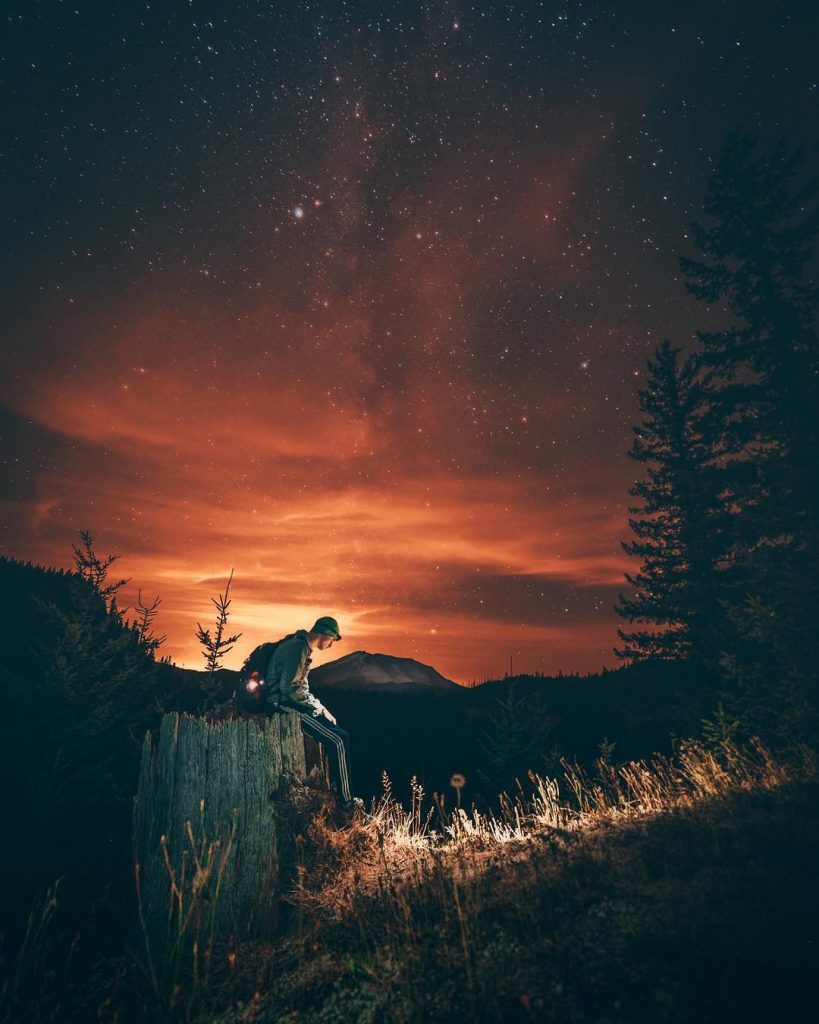 This shot represents a variety of things:
1. That’s my son sitting on the stump who is awesome at helping me finding killer vantage points with interesting backgrounds.
2. Access is limited by weather and seasonal trail closures making for a challenge.
3. Alignment of the Milky Way takes until the end of summer to come into view, and there’s a good chance you won’t get it in the short window. This view can be seen for around 20 days per year.
Tips for Shooting Astro!
-
Keep an eye on the weather. Clear skies are good, but some clouds add mood and depth of field.
-
Plan out your spot before going off the grid. Things look different at night and it’s easy to get lost. Download an offline map on your mobile device. Google Maps works great, but if you want more detail to download an app that gives more details.
-
Know what time things happen in the night sky. Use Photopills to see when the night sky gets dark enough to shoot planets and the Milky Way.
-
Pack for the occasion. DSLR or Mirrorless Camera. Low light lens, lower the f-stop and aperture the better. F/2.8 is recommended. 11mm to 14mm lenses are a good place to start. 20mm on up aren’t as forgiving. A Headlamp is a must with extra batteries (My favorite are made by Petzl), jacket, sweatshirt, hat, gloves, food, and water. A lot of times shooting stars means cold temps, but not always depending on what part of the country you live in or what season it is. The Milky Way season is different for Northern and Southern Hemisphere.
-
Find an object to use as your reference point when placing the stars or galaxy into the viewfinder. This will help you frame your shot. Plus shooting without a backdrop is boring and doesn’t provide a point of view.
-
Be patient. The earth turns fast and so do the stars and galaxy. If you’re shot doesn’t line up right away, it could take just a few minutes to align. Be patient, but results sometimes take a little bit of time. Don’t be afraid to change vantage points multiple times in order to get a good shot. Your spot isn’t always going to work like magic every time, the Milky Way moves position every month, in addition, the premium time to shoot varies by the moon cycle and changes each month.
-
Know the details of your hemisphere. In the Northern Hemisphere, the Milky Way Galactic Core becomes visible around April and lasts until September. In April you’ll find it in the eastern sky, by mid-summer it drifts to the south sky, and by fall it fades away into the southwest sky.
-
Test shoot early and often. When you get to your destination, gear up and go fire off some test shots. These shots will inform you about what adjustments may need to be made.
-
Mind your white balance. White balance is important. It levels the playing field. Not all Night Sky’s are the same. It depends on a lot of things: weather, airflow, light pollution from metropolitan areas, and more. Most colors can change in post-processing, but it’s always best to “get it right” in camera first.
-
Know every night and situation is unique. Use Auto white balance or cool white for test shots. Try both, see what looks good. Set your camera to M (Manual Mode), then dial in shutter speed; depending on how much light is around is you will ultimately determine your optimum shutter speed duration. For dark nights with a new moon I lean toward a 30-second exposure, but other times I go as long as two minutes to as little as 15-20 seconds. It just depends. Set your aperture (f-stop) to wide open stopping down as far as your lens will go. The lower the f-number the wider so that more light can be let into your camera’s sensor. f/2.8 is a good aperture. Experienced shooters use lower f stops because they often shoot with larger lenses which don’t allow as long of durations without star trails. So if you’re first starting out an 11mm on a crop sensor or 14mm on full frame camera work really well.
-
11. Experiment with focus. Don’t worry too much about focusing if your reference point features are far enough away; it will all be in focus after a certain point. To achieve this, set your lens to manual focus and dial it to infinity. You can use autofocus too, but that can get tricky unless you know how to fully manipulate your equipment. Use a wireless remote or wired to fire off your shot (hand movement can blur your long exposure shot). Review in LCD afterward and adjust accordingly. If it’s too bright, lower down the exposure time by 5 or 10 seconds. If it doesn’t look good to you change your white balance. If your reference point is out of focus, adjust the lens manually by backing it off until the object is clear. Move the lens dial ring away from infinity in small corrections. Some cameras allow you to view your subject in real time with a live focus meter so you can see what’s Not in focus. Also, some of the more expensive cameras and most mirrorless cameras offer a Peaking option, which provides a handy solution to learn if you’re in focus. It will show you what’s in focus by highlighting the areas and displaying the results in your viewfinder.
 Shooting astro photos is a blast. The most important thing is to stop talking about it and start doing it. Get out there! Be sure to comment below and tell us about your Astro adventures!
You can follow more of my photography HERE.