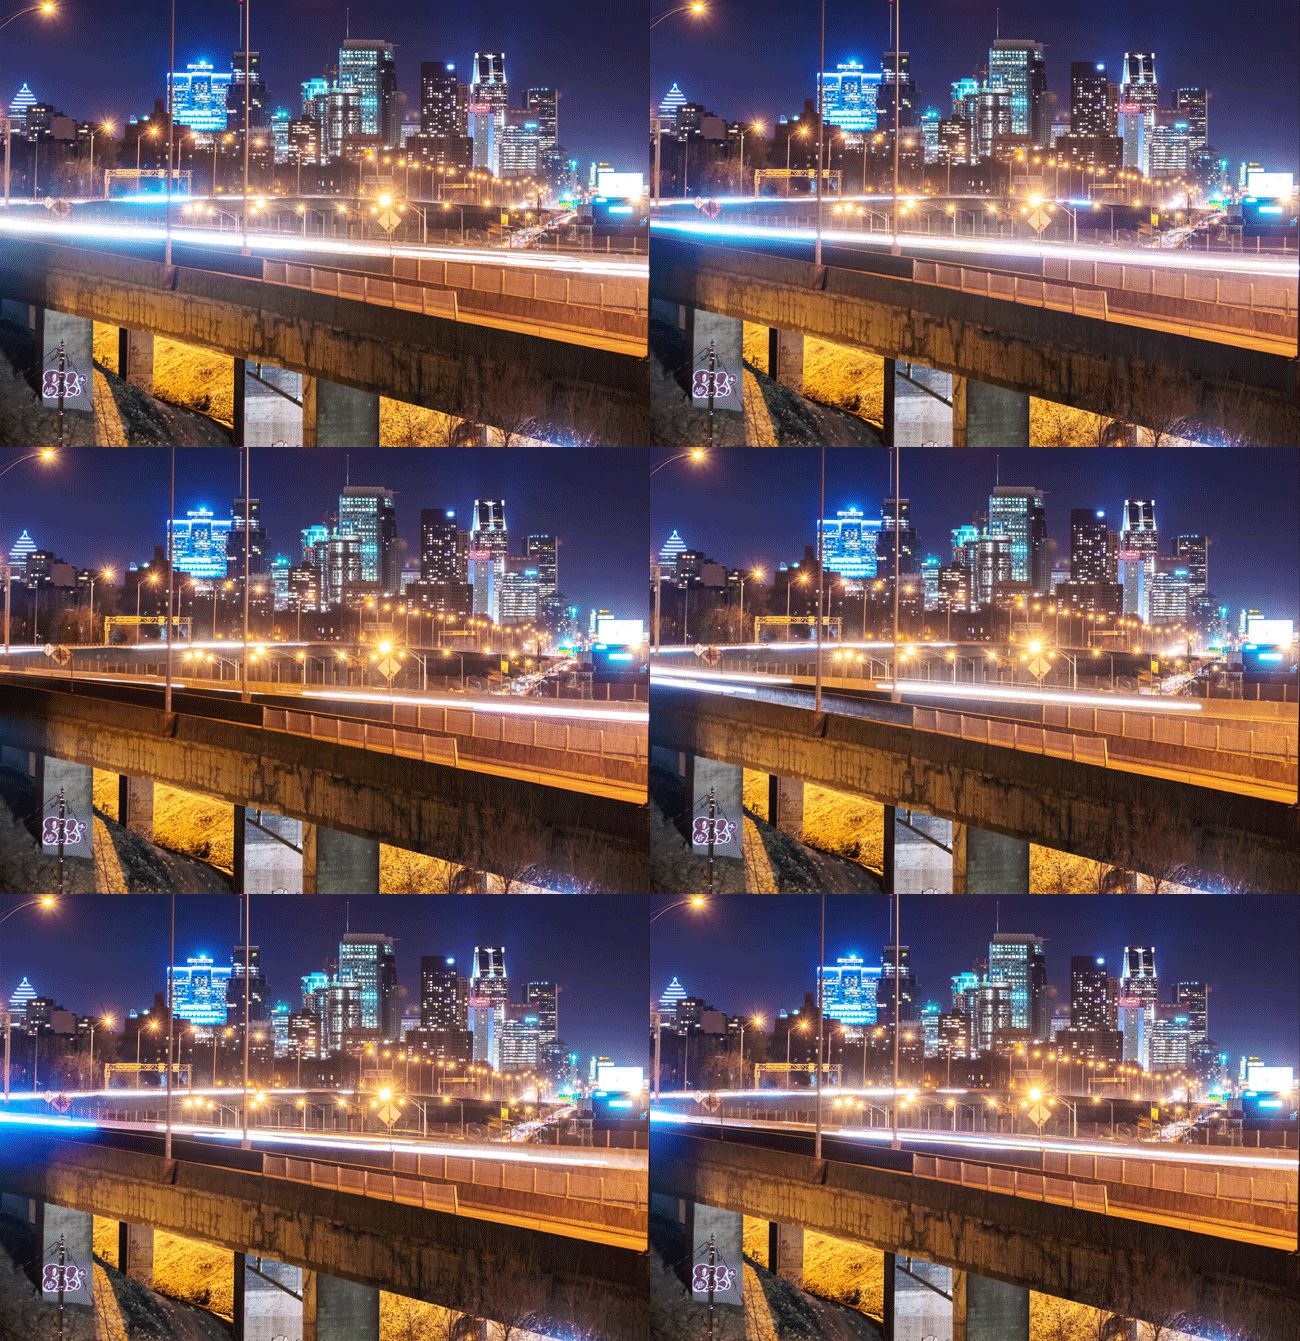
perpetual motion and frozen time:
For the uninitiated, a cinematograph is essentially halfway between a photograph and a video. It lets you exist and relive a single moment indefinitely – kind of perpetual motion and frozen time all at once, a paradox that is certainly partly behind their charm.
As a cinematographer and photographer, you can see how they’re the perfect medium for me. And in hopes of getting other people to enjoy them as much as I do, I’m putting together a little tutorial for you all to show you the basics.
There are a million ways to make a cinematograph. I’m choosing a pretty basic one here so that we’re not jumping in over our heads.
What you will need:
- Photoshop/ Lightroom
- Camera
- Tripod
First step:
Take your photos. Given that what we’re going for here is those light trails, you’ll definitely need a tripod to take some long exposures.
Find a spot where there’s regular traffic going by, set up your legs and get shooting.
I shot these at f/7 1600 ISO with an exposure time of 1.6 seconds on my Sony A7rii.
- It is a good idea to use a time delay on the shutter so that you’re not introducing a shake by taking the picture.
To get the sense of motion, you’ll need a bunch of shots. But since the light trails are pretty abstract, the timing between them doesn’t matter as much. The more photos you have, the more variation in the movement you’ll get.
You can probably make this work with as few as 5 shots, but for mine, I used 23.
Step Two:
Bring the images into Lightroom or Photoshop and edit them according to your tastes. The only key here is to leave enough contrast so that the lights really pop, and you really feel them moving. Otherwise, this is all about your tastes.
- Export them as high-quality .jpegs into a folder. You’ll want to name them with a recurring name + number (ie city1.jpg, city2.jpg, etc.) you’ll see why soon.
Open After Effects, start a new project. Then go to file > import.
If you’ve named your images properly, choosing just the first image will cause AE to import them all as an image sequence animation. They’ll appear as a single file in your project window. Double click on it and hit your spacebar. It should start playing – cool! The cars are moving!
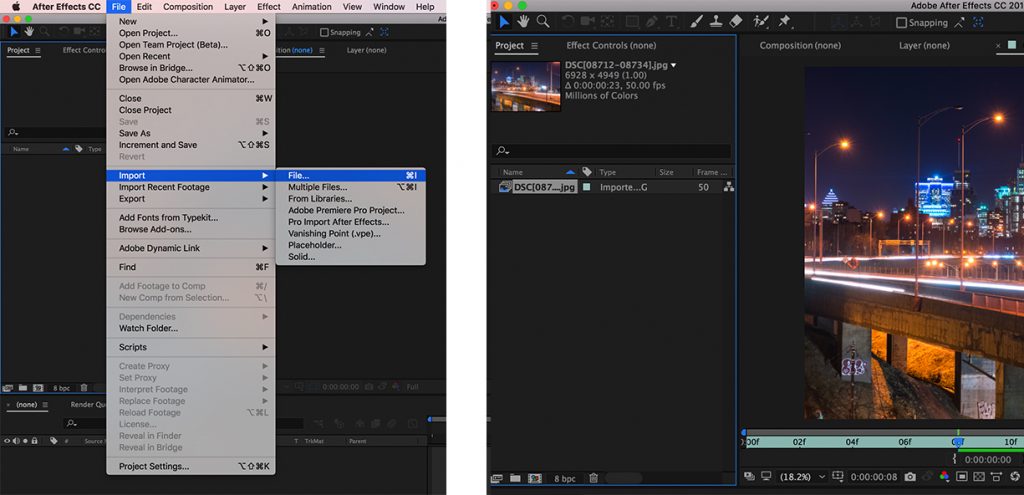
At this point, the speed of the cars is not to your liking. Want to slow it down/speed it up? Easy.
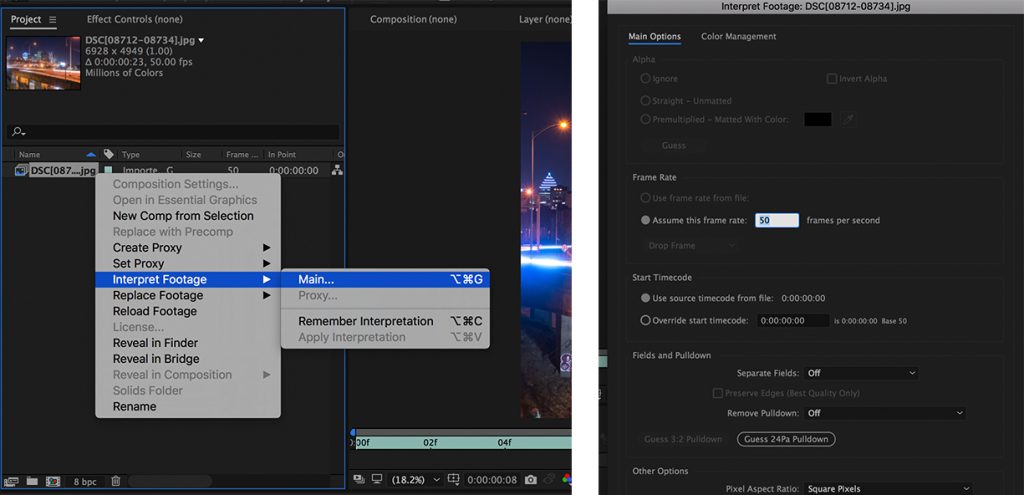
Right click on the footage in the project window and choose to Interpret Footage > Main.
From there you’ll see “Assume this frame rate”. Mess with that. The higher the number, the faster it will move. Fine tune it to your liking.
Next, right click on your footage and choose ‘New comp from selection’. Now you’ll have a timeline for your lightspeed timelapse. As you play it here, you’ll start to see an animation happening.
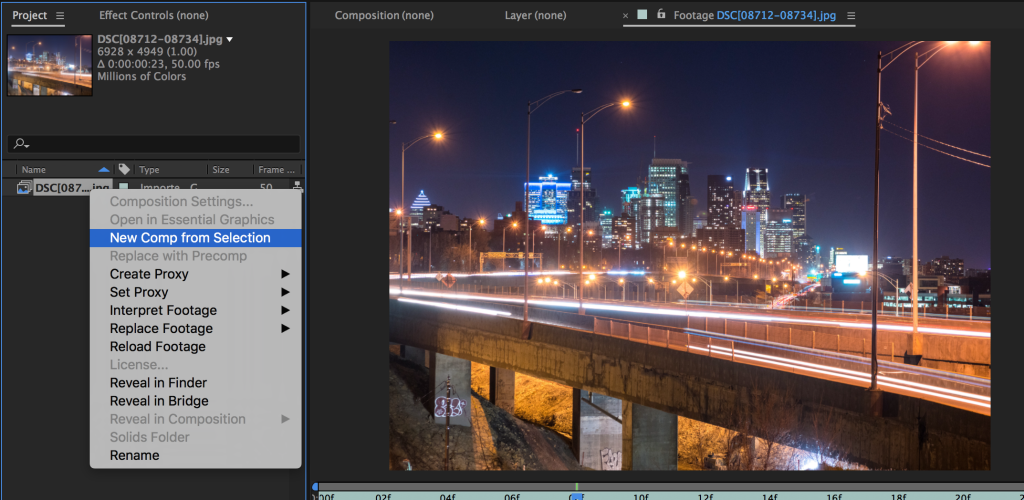
The cars are going by! Cool! But there’s a good chance you have a problem: the frame is a bit shaky.
Let’s fix that.
With your layer selected in the timeline below, go to Animation > Warp Stabilizer FX. You’ll want to leave the setting as is except for these: Result= No motion and Framing = Stabilize Only.
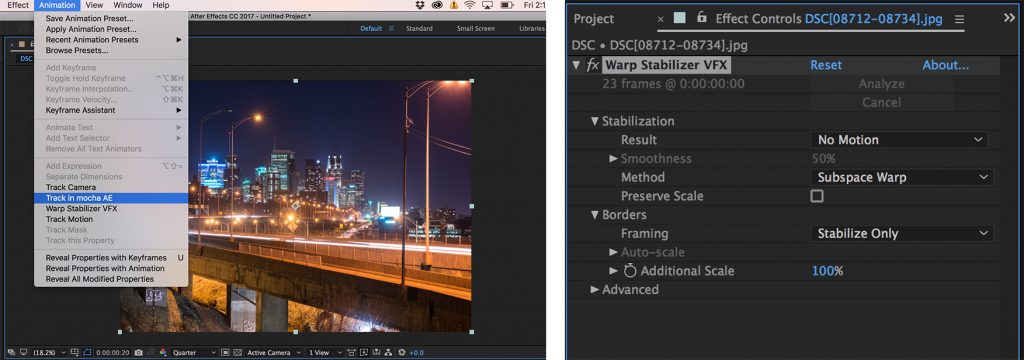
Once this works its magic, assuming your frames weren’t all over the place, your images should be way smoother. Aligning the images means AE may need to shift them a bit, so you may end up with empty space on the edges of your frame.
Let’s deal with that.
You’re going to click on the little icon underneath your image to the left of the checkered icon, as seen below.
Then with that chosen, draw a box over your image.
This is a great time to crop it to whatever frame is most pleasing visually.
Once you have that done, go to Composition > Crop Comp to Region of Interest. Boom.

And there you have it!
You should now have a smooth and still animation of lights flying by. There are of course a million alterations you can make to this at this point, but you’ve got yourself a basic cinematography.
Drag your composition from the project window into the render queue tab to export it. Set the settings you want and render it out.
From here you’ll have a video file of the cinematography. This is good for a few reasons: first of all, Instagram won’t accept GIFs, only videos. But it loops them automatically, so this should work beautifully there. Also, popular GIF site GIPHY allows you to upload a GIF from a video directly. But if you really do need it to be in GIF format, just open the video in Photoshop by dragging and dropping it in, and then go to File > Export > Save for The Web (legacy) and do it from there!
Thank you for reading and Happy shooting!
If you found this to be helpful, please comment bellow! I would love to hear from you!

